Pop Art Magic: A Comprehensive Guide to Creating a Simple Pop Art Effect with Photoshop
Introduction:
Pop art, with its vibrant colors and bold graphic style, has remained an influential and timeless artistic movement. In the digital age, Photoshop serves as a powerful tool for bringing the essence of pop art to contemporary creations. This comprehensive guide will walk you through the step-by-step process of creating a simple pop art effect in Photoshop, allowing you to infuse your images with the iconic flair of this celebrated art form.
Section 1: Setting the Stage
Before diving into the world of pop art, open Adobe Photoshop and prepare your workspace. Import the image you want to transform into a pop art masterpiece. Choose an image with clear features and well-defined contours, as these elements play a crucial role in achieving a striking pop art effect.
Section 2: Understanding Pop Art Elements
Pop art is characterized by vibrant colors, bold contrasts, and the use of recognizable symbols and imagery. Key elements often include dots, bold outlines, and flat color areas. Keeping these characteristics in mind will guide your decisions as you progress through the steps of creating a pop art effect.
Section 3: Duplication and Base Adjustment
To preserve the original image, start by duplicating the layer. Select the duplicated layer and make basic adjustments to enhance the image’s contrast and vibrancy. Use tools like Levels, Curves, and Saturation to achieve a vibrant and visually impactful base for the pop art transformation.
Section 4: Creating Color Separations
One hallmark of pop art is the use of distinct color areas. Achieve this effect by creating color separations. Duplicate the base layer and desaturate each duplicate, leaving one layer for each primary color (red, blue, and yellow). Adjust the hue and saturation to emphasize the desired color in each layer.
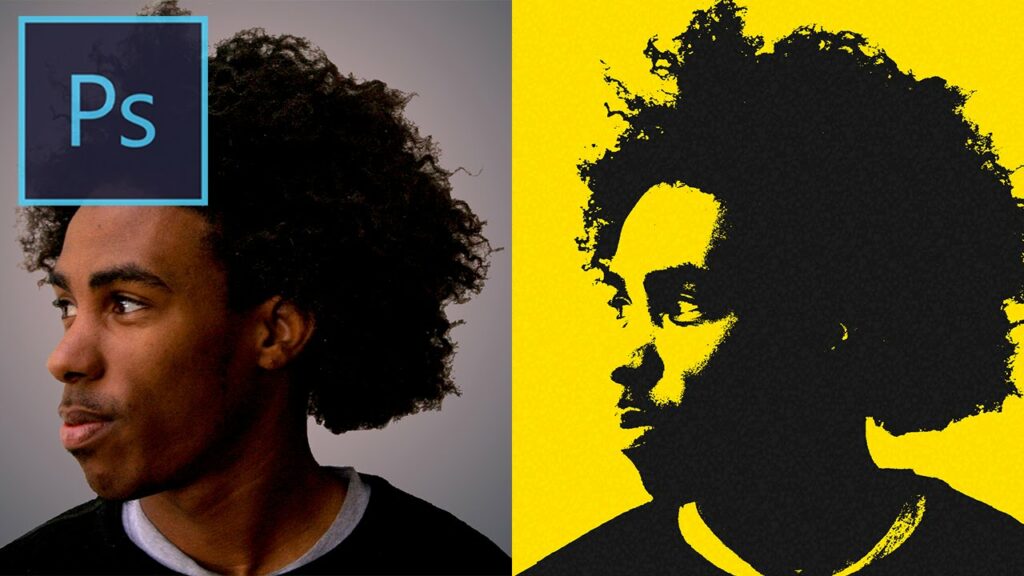
Section 5: Applying Threshold Effect
To further simplify the color areas and create a graphic look, apply the Threshold effect to each color separation layer. This will convert the images into high-contrast, black-and-white representations with clear outlines. Experiment with the threshold levels to find the right balance between detail and simplicity.
Section 6: Incorporating Dots – The Ben-Day Dots Technique
The iconic dots seen in traditional pop art can be achieved using the Ben-Day dots technique. Create a new layer on top of the color separation layers and fill it with a neutral color. Then, apply a Filter > Pixelate > Color Halftone. Adjust the radius to control the size of the dots, creating a dotted pattern that adds texture and depth to the pop art effect.
Section 7: Adding Bold Outlines
Bold outlines are a staple of pop art, emphasizing the graphic nature of the style. Create a new layer above the color separation layers and use the Brush tool to outline the main features of the image with a contrasting color. Adjust the brush size and opacity to achieve bold, clean lines that define the subject.
Section 8: Customizing Colors and Experimenting
Pop art is known for its vibrant color palette. Experiment with the colors in each color separation layer, adjusting the hues and saturations to create a visually striking composition. Don’t be afraid to explore unconventional color combinations – pop art thrives on bold and unexpected choices.
Section 9: Merging and Fine-Tuning
Once satisfied with the individual elements, merge the layers to bring your pop art composition together. Fine-tune the overall composition by adjusting contrasts, colors, and details. Consider using adjustment layers to refine the balance and coherence of the final pop art effect.
Section 10: Background Integration
To enhance the visual impact of your pop art creation, consider integrating a complementary background. Experiment with solid colors, gradients, or patterns that resonate with the overall theme of your pop art piece. Adjust the background to achieve a cohesive and aesthetically pleasing result.
Section 11: Exporting and Sharing Your Pop Art Masterpiece
After finalizing your pop art effect, save your masterpiece. Consider creating different versions with varied color schemes or details for a diverse portfolio. Share your pop art creation on social media, personal websites, or print it to showcase your artistic flair and pay homage to the vibrant spirit of the pop art movement.
Conclusion:
Creating a simple pop art effect in Photoshop is a journey of artistic expression and bold experimentation. This comprehensive guide has provided a detailed roadmap for transforming ordinary images into striking pop art masterpieces. As you continue to explore the endless possibilities of pop art in Photoshop, embrace the bold colors, graphic elements, and iconic style that define this influential art movement. Let your creativity flourish, and revel in the visual impact of your unique pop art creations.


