Mastering Timeless Elegance: A Comprehensive Guide to Easy Sepia Toning with the Camera Raw Filter in Photoshop CC
Introduction:
In the realm of digital photography and post-processing, the art of sepia toning has endured as a classic technique that evokes a sense of vintage elegance and nostalgia. With the advent of Adobe Photoshop CC and its powerful Camera Raw Filter, achieving the timeless sepia effect has become more accessible than ever. In this extensive guide, we will explore the step-by-step process of effortlessly applying sepia toning to your photographs using the Camera Raw Filter in Photoshop CC. Whether you’re a seasoned photographer or an aspiring digital artist, this guide will empower you to infuse your images with a touch of historic charm and sophistication.
Understanding the Significance of Sepia Toning:
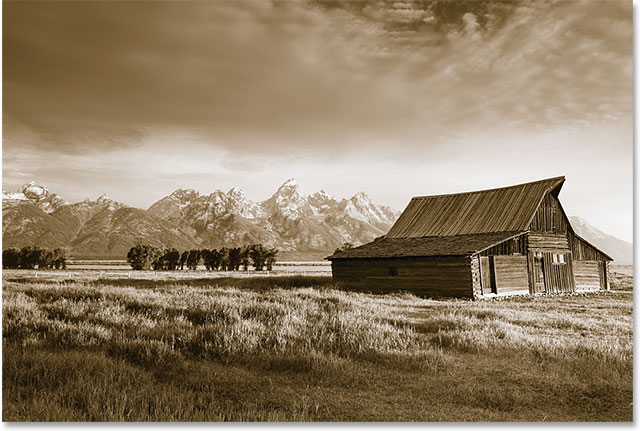
Sepia toning, historically associated with antique photographs, imparts a warm, brownish tone to images, creating a sense of timelessness and artistic flair. This technique is particularly effective in enhancing portraits, landscapes, or any photograph where you seek to convey a mood of vintage authenticity. Sepia toning not only adds a layer of visual interest but also imbues the image with a narrative quality, as if capturing a moment frozen in time.
Step-by-Step Guide to Easy Sepia Toning with the Camera Raw Filter in Photoshop CC:
- Open Your Image in Photoshop CC: Launch Adobe Photoshop CC and open the image you wish to sepia tone. Ensure that the image is of sufficient resolution for detailed editing.
- Access the Camera Raw Filter: With your image open, go to Filter > Camera Raw Filter. This opens the Camera Raw interface, providing a versatile set of tools for color correction and tonal adjustments.
- Navigate to the “Basic” Panel: In the Camera Raw interface, locate the “Basic” panel. This panel contains sliders for adjusting exposure, contrast, highlights, shadows, and more.
- Adjust White Balance: Begin by adjusting the white balance to achieve a warmer tone. Slide the Temperature slider towards the right until you attain a pleasing warm hue. This sets the foundation for the sepia effect.
- Fine-Tune Exposure and Contrast: Use the Exposure and Contrast sliders to fine-tune the overall brightness and contrast of the image. Be mindful not to overexpose or lose important details in the process.
- Modify Highlights and Shadows: Adjust the Highlights and Shadows sliders to balance the intensity of bright and dark areas. This step helps in achieving a well-balanced tonal range, essential for an effective sepia tone.
- Introduce Sepia Hue with Split Toning: Navigate to the “Split Toning” panel in Camera Raw. Here, you can introduce the sepia tone by adjusting the Hue and Saturation sliders for both the Highlights and Shadows. Experiment until you achieve the desired warmth.
- Fine-Tune Clarity and Vibrance: Use the Clarity slider to enhance mid-tone contrast, adding a subtle crispness to the image. Adjust Vibrance to control the intensity of muted colors, ensuring a harmonious sepia effect.
- Apply Vignette for Focus: Move to the “Effects” panel in Camera Raw and apply a subtle vignette. This draws attention to the center of the image, adding a touch of vintage emphasis.
- Explore Additional Adjustments: Take advantage of other tools in the Camera Raw interface, such as the HSL/Grayscale panel for targeted color adjustments and the Detail panel for sharpening.
- Preview and Compare: Regularly toggle between the “Before” and “After” views in the Camera Raw interface to assess the impact of your adjustments. This ensures that the sepia toning enhances rather than detracts from the original image.
- Click “OK” to Apply: Once satisfied with your sepia toning adjustments, click “OK” in the Camera Raw interface to apply the changes to your image in Photoshop CC.
- Fine-Tune in Photoshop (Optional): After applying the Camera Raw Filter, you can further fine-tune your image in Photoshop if needed. Utilize additional tools and adjustments for localized edits or creative enhancements.
- Save Your Sepia-Toned Masterpiece: Save your sepia-toned image in the desired format, preserving the timeless elegance you’ve infused into your photograph.
Conclusion:
Easy sepia toning with the Camera Raw Filter in Photoshop CC opens a gateway to a world of vintage charm and artistic expression. By following the step-by-step guide provided, you can effortlessly transform your images into timeless masterpieces that evoke the aesthetics of a bygone era. Sepia toning is not just a technical adjustment; it’s a journey into storytelling and emotional resonance, where each photograph becomes a canvas for the passage of time. So, embrace the warmth of sepia tones, refine your skills in Adobe Photoshop CC, and elevate your photography to new heights of classic elegance and sophistication.


