Unveiling Dynamism: A Comprehensive Guide to Creating the Radial Blur Action Effect in Photoshop

Introduction:
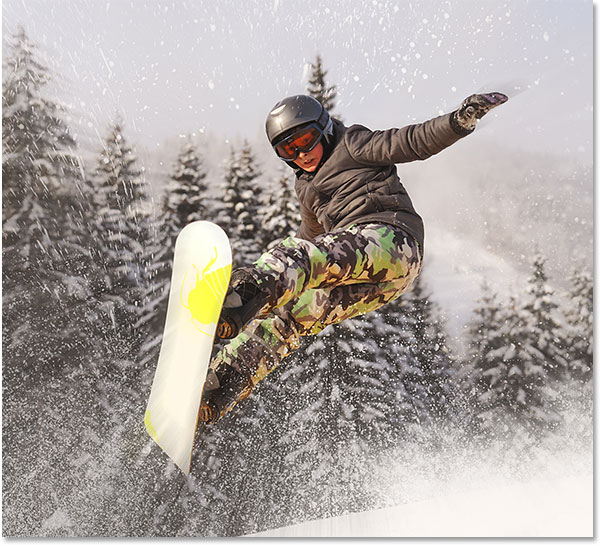
Photography and graphic design often seek innovative ways to infuse energy and movement into still images, creating visually dynamic and captivating compositions. One powerful technique for achieving this sense of motion is the Radial Blur Action Effect in Photoshop. This effect adds a dynamic spin to images, simulating the feeling of speed or a burst of energy. In this extensive guide, we will delve into the intricacies of creating the Radial Blur Action Effect in Photoshop, empowering photographers and digital artists to breathe life into their static visuals with a touch of dynamic flair.
Understanding the Significance of Radial Blur:
Radial blur, characterized by a circular blurring pattern that radiates from a central point, is a versatile tool that can be applied in various creative contexts. This effect is often used to convey a sense of movement, speed, or intense focus on a central subject. Whether you are looking to simulate the rapid motion of a speeding vehicle, the whirlwind excitement of a dynamic event, or simply add a touch of surrealism to your images, the Radial Blur Action Effect in Photoshop is a valuable asset in your creative toolkit.
Step-by-Step Guide to Creating the Radial Blur Action Effect in Photoshop:
- Open Your Image in Photoshop: Launch Adobe Photoshop and open the image you want to apply the Radial Blur Action Effect to. Ensure that the image is of sufficient resolution for detailed editing.
- Duplicate the Background Layer: To preserve the original image, duplicate the background layer by right-clicking on it and selecting “Duplicate Layer” from the menu.
- Convert the Layer to a Smart Object: Right-click on the duplicated layer and choose “Convert to Smart Object.” This step allows for non-destructive editing, enabling you to adjust the effect later if needed.
- Access the Radial Blur Filter: With the Smart Object layer selected, go to Filter > Blur > Radial Blur. This opens the Radial Blur dialog box, presenting options for adjusting the blur effect.
- Choose Blur Method: In the Radial Blur dialog box, select the desired blur method. “Spin” is commonly used for creating a circular motion effect, while “Zoom” simulates the appearance of objects moving towards or away from the viewer.
- Set the Amount and Quality: Adjust the “Amount” slider to control the intensity of the blur. Experiment with different values to achieve the desired level of motion. The “Quality” slider controls the smoothness of the blur; higher values result in a more polished effect.
- Specify the Center of the Blur: Use the crosshair in the Radial Blur dialog box to set the center point of the blur. Click and drag the crosshair to position it over the focal point where you want the blur to emanate from.
- Preview and Refine: Click “OK” to apply the Radial Blur and preview the effect on your image. If necessary, go back to the Smart Object layer, double-click on the Radial Blur filter in the Layers panel, and readjust the settings for optimal results.
- Add Adjustment Layers (Optional): Fine-tune the overall appearance of your image by adding adjustment layers. Consider adjustments like contrast, saturation, or color grading to enhance the visual impact of the Radial Blur Action Effect.
- Experiment with Blend Modes: Create additional depth and drama by experimenting with blend modes for the blurred layer. Overlay, Soft Light, or Screen are popular choices, each offering a unique blend with the original image.
- Duplicate and Stack Layers (Optional): For a more intense or layered effect, duplicate the Smart Object layer and adjust the opacity or blend mode of the duplicated layer. This step can add complexity and depth to the Radial Blur Action Effect.
- Fine-Tune Details with Masking: Use layer masks to selectively reveal or conceal parts of the blurred layer. This is particularly useful for maintaining clarity in specific areas of the image, allowing for a nuanced application of the Radial Blur.
- Review and Save Your Work: Review the final result and make any additional adjustments to achieve the desired visual impact. Once satisfied, save your work in the desired format.
Conclusion:
The Radial Blur Action Effect in Photoshop is a powerful tool for infusing static images with a sense of dynamic movement and energy. By following the comprehensive steps outlined in this guide, you can master the art of creating radial blur effects that evoke a wide range of emotions and narratives. Experiment with different images, explore various blur settings, and let your creativity soar as you transform ordinary visuals into dynamic and captivating masterpieces. Embrace the dynamic potential of the Radial Blur Action Effect in Photoshop, and unlock a new dimension of visual storytelling in your photography and design projects.


