Illuminating the Canvas: A Comprehensive Guide to Creating the Starry Night Sky Effect with Photoshop CS6

Introduction:
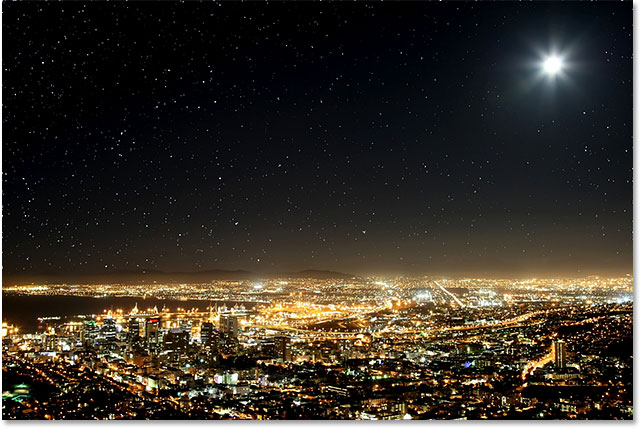
The allure of a starry night sky has captivated humanity for centuries, inspiring countless works of art and evoking a sense of wonder. With the advent of digital creativity, photographers and artists now have the tools to bring the magic of a starry night to their images. Adobe Photoshop CS6, a versatile image editing software, provides a robust platform for crafting the mesmerizing Starry Night Sky Effect. In this extensive guide, we will explore the step-by-step process of transforming a plain night sky into a celestial masterpiece using Photoshop CS6. Whether you’re a seasoned digital artist or a budding photographer, this guide will unlock the secrets to infusing your images with the enchantment of a star-studded night.
Understanding the Significance of the Starry Night Sky Effect:
The Starry Night Sky Effect in Photoshop serves as a creative gateway to transcend the ordinary and transform the atmosphere of an image. Whether you are enhancing a night landscape photograph, creating a fantastical scene, or adding a celestial backdrop to a portrait, this effect introduces a touch of magic and mystery. The interplay of stars against the inky canvas of the night sky evokes a sense of awe and invites viewers to immerse themselves in a dreamlike realm.
Step-by-Step Guide to Creating the Starry Night Sky Effect with Photoshop CS6:
- Open Your Image in Photoshop CS6: Launch Adobe Photoshop CS6 and open the image that you want to transform into a starry night sky. Ensure that the image is of sufficient resolution for detailed editing.
- Create a New Layer for the Stars: Add a new layer to the image that will serve as the canvas for your stars. This layer will be placed above the original image, allowing you to paint the stars without altering the underlying scene.
- Select the Brush Tool: Activate the Brush Tool (B) from the toolbar. Choose a small, round brush with a soft edge to emulate the distant and diffused appearance of stars. Adjust the brush size based on your preferences and the scale of the image.
- Set Foreground Color to White: Ensure that the foreground color is set to white, as this will be the color of the stars. You can achieve this by selecting white from the color palette or pressing the ‘D’ key to reset the colors to default (black and white) and then ‘X’ to switch to white as the foreground color.
- Adjust Brush Opacity: To create a realistic distribution of stars with varying intensities, adjust the opacity of the brush. Lower opacity values will produce fainter stars, while higher values will result in more prominent ones.
- Randomly Paint Stars: Begin painting stars across the new layer, focusing on areas where you want the starry effect to be most pronounced. Embrace randomness in size, spacing, and placement to mimic the natural diversity of stars in the night sky.
- Vary Star Sizes and Opacity: To enhance realism, vary the size and opacity of the stars. This step adds depth to the starry night sky, creating a nuanced and captivating celestial backdrop.
- Create Star Clusters (Optional): For a more dynamic effect, consider grouping stars into clusters. Use the Brush Tool to paint clusters of stars in specific areas, contributing to the overall richness of the starry night sky.
- Adjust Layer Opacity: Fine-tune the intensity of the starry night sky by adjusting the opacity of the star layer. This allows you to control the balance between the stars and the original image, achieving the desired visual impact.
- Add Color Variations (Optional): Experiment with adding subtle color variations to the stars. Create a new layer above the star layer and apply a gradient or soft brush strokes in hues of blue or violet. Adjust the blending mode and opacity to integrate the colors seamlessly.
- Apply Gaussian Blur (Optional): To simulate the depth and distance of stars, consider applying a Gaussian Blur to the star layer. This softens the edges of the stars and contributes to a more realistic portrayal of the night sky.
- Merge Layers and Save: Once satisfied with the starry night sky effect, merge the layers (if necessary) and save your image in the desired format. This preserves your original image while incorporating the magical transformation.
- Experiment with Blend Modes: Explore different blend modes for the star layer to enhance the interaction between the stars and the underlying image. Overlay, Screen, or Lighten modes are commonly used for this purpose.
- Global Adjustments (Optional): Consider making global adjustments to the entire image, such as color grading, contrast, or brightness. This ensures that the starry night sky integrates seamlessly with the overall visual tone.
- Fine-Tune and Review: Zoom in and review the image for any irregularities or areas that may need fine-tuning. Pay attention to the balance of stars, their distribution, and the overall harmony with the original scene.
- Save and Share Your Starry Masterpiece: Once satisfied with the results, save your image and share your starry night masterpiece with the world. Whether it’s a breathtaking landscape or a whimsical portrait, the Starry Night Sky Effect can add a touch of enchantment to your creative endeavors.
Conclusion:
Creating the Starry Night Sky Effect in Photoshop CS6 opens a portal to a realm of imagination and celestial beauty. By following the comprehensive steps outlined in this guide, you can master the art of infusing your images with the mesmerizing allure of a star-studded night. Whether you’re an astrophotographer enhancing a night sky scene or a digital artist crafting a dreamlike composition, the Starry Night Sky Effect provides a versatile and magical touch to your creative endeavors. Embrace the cosmos, let your creativity soar, and illuminate your digital canvas with the brilliance of a starry night sky.


