How to Wire Components in a Schematic in Autodesk Electrical
Wiring components in a schematic drawing within Autodesk Electrical is a pivotal step in the electrical design process. Proper wiring ensures that the electrical system functions as intended, facilitating the flow of current and enabling communication between components. In this comprehensive guide, we will explore the various methods and best practices for wiring components in a schematic using Autodesk Electrical, ensuring accuracy, efficiency, and clarity in your designs.
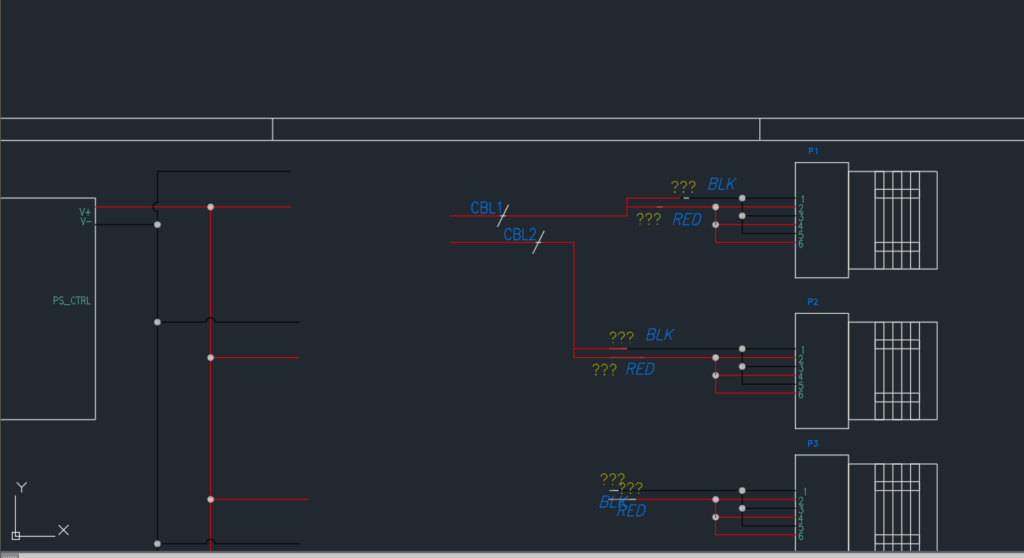
1. Understanding Wiring in Autodesk Electrical
Before delving into the wiring process, it’s crucial to understand the fundamentals of wiring in Autodesk Electrical.
Wiring Symbols
- Wire Segments: Represented by lines connecting components, wire segments indicate the flow of current between components.
- Wire Crossings: Crossings indicate connections between wires without physical contact, such as junctions or connections within components.
Wire Properties
- Color and Line Type: Wires can have different colors and line types to differentiate between different types of connections or signal paths.
- Wire Tags: Each wire segment is assigned a unique tag to identify it within the schematic and facilitate cross-referencing.
2. Accessing Wiring Tools
Autodesk Electrical provides a range of tools and features to facilitate the wiring process.
Step 1: Open Wiring Tools
- Wiring Toolbar: Locate and click on the Wiring toolbar in the main interface of Autodesk Electrical.
- Select Wiring Tool: Choose the appropriate wiring tool based on the type of connection you need to make, such as straight wire, curved wire, or connection lines.
Step 2: Customize Wiring Settings
- Wire Properties: Customize wire properties such as color, line type, and size to match your project requirements.
- Wire Numbering: Configure wire numbering settings to automate the assignment of wire tags and ensure consistency throughout the schematic.
3. Wiring Components
With the wiring tools accessed and configured, you can now begin wiring components in your schematic.
Step 3: Connect Components
- Select Wiring Tool: Choose the appropriate wiring tool based on the type of connection you need to make.
- Click to Connect: Click on the starting point of the connection, then drag the cursor to the endpoint and click again to complete the connection.
Step 4: Route Wires
- Path Selection: Choose the most efficient path for routing wires between components, avoiding unnecessary crossings or overlaps.
- Drag and Drop: Use the mouse to drag and drop wire segments into position, adjusting the routing as needed to optimize clarity and organization.
Step 5: Create Wire Junctions
- Intersection Points: Identify points where wires intersect or cross paths within the schematic.
- Insert Junctions: Use the appropriate wiring tool to insert junctions at these points, ensuring proper electrical connections between wires.
4. Configuring Wire Properties
After wiring components, it’s essential to configure wire properties to accurately represent the electrical connections within the schematic.
Step 6: Edit Wire Properties
- Select Wire Segment: Click on the wire segment to select it.
- Properties Dialog: Right-click on the wire segment and choose the ‘Properties’ option to access its properties dialog box.
Step 7: Configure Wire Tags
- Assign Tags: Assign a unique tag to each wire segment to identify it within the schematic.
- Automated Tagging: Utilize Autodesk Electrical’s automated wire numbering feature to assign tags automatically based on predefined settings.
Step 8: Adjust Line Type and Color
- Line Type: Choose an appropriate line type for the wire segment to distinguish between different types of connections or signal paths.
- Color Coding: Utilize color coding to visually differentiate between wires carrying different types of signals or serving different functions within the schematic.
5. Connecting Multi-Part Components
Some components consist of multiple parts that require specific wiring connections between them.
Step 9: Identify Connection Points
- Component Structure: Understand the internal structure of multi-part components and identify the connection points between individual parts.
- Datasheets: Refer to component datasheets or documentation for guidance on wiring connections between parts.
Step 10: Establish Connections
- Wire Routing: Route wires between the appropriate connection points of the multi-part components, ensuring proper alignment and clearance.
- Cross-Referencing: Update wire tags and cross-references to reflect the connections between different parts of the component.
6. Cross-Referencing and Error Checking
Cross-referencing and error checking are critical steps to ensure the accuracy and integrity of the wiring within the schematic.
Step 11: Cross-Reference Components
- Cross-Reference Tool: Use the cross-reference tool to establish and maintain accurate references between interconnected components.
- Update References: Update cross-references as needed to reflect any changes or additions to the wiring within the schematic.
Step 12: Perform Error Checking
- Error Checking Tool: Utilize Autodesk Electrical’s built-in error checking tool to identify and resolve any errors or inconsistencies in the wiring.
- Review and Resolve: Review the list of identified errors and take appropriate actions to resolve them, ensuring that the wiring is accurate and complete.
7. Finalizing the Wiring
Once the wiring is complete and verified, it’s time to finalize the schematic.
Step 13: Review and Validate
- Visual Inspection: Conduct a visual inspection of the wiring within the schematic to ensure that all connections are accurate and properly routed.
- Functional Validation: Validate the schematic against design specifications or requirements to ensure that it meets the intended functionality.
Step 14: Generate Reports
- Reports Manager: Use Autodesk Electrical’s reports manager to generate reports such as wire lists, connection diagrams, and cable schedules based on the wiring within the schematic.
- Document Outputs: Save generated reports for documentation purposes and future reference.
8. Best Practices for Wiring Components
Adhering to best practices can help ensure accuracy, efficiency, and clarity in the wiring process.
Plan Wire Routing
- Path Optimization: Plan and optimize wire routing to minimize clutter and ensure clear visualization of connections.
- Separation of Signals: Separate wires carrying different types of signals or serving different functions to avoid confusion.
Consistent Wire Labeling
- Standardized Tags: Use a consistent tagging system for wires to maintain clarity and facilitate cross-referencing.
- Automated Tagging: Take advantage of Autodesk Electrical’s automated wire numbering feature to ensure consistency and accuracy in wire labeling.
Error Prevention and Correction
- Regular Validation: Regularly validate wiring against design specifications or requirements to catch errors early in the process.
- Documentation: Maintain detailed documentation of wiring connections and revisions to facilitate error correction and troubleshooting.
Collaboration and Review
- Peer Review: Foster collaboration among team members to review and validate wiring within schematics, leveraging collective expertise and insights.
- Feedback Loop: Establish a feedback loop to gather input and suggestions for improving the wiring process and schematic quality.
Conclusion
Wiring components in a schematic within Autodesk Electrical is a crucial aspect of the electrical design process. By following the steps outlined in this guide and adhering to best practices, you can ensure accuracy, efficiency, and clarity in your schematic designs.


