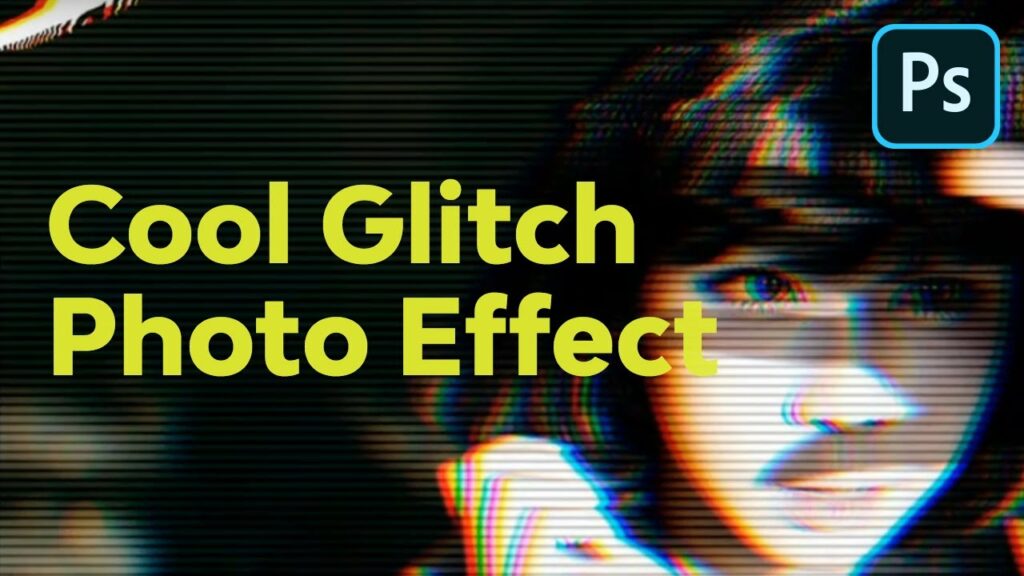
Unleashing Digital Anarchy: A Comprehensive Guide on How to Create a Cool Glitch Photo Effect in Adobe Photoshop
Introduction:
In the ever-evolving landscape of digital art, the glitch photo effect stands as a symbol of rebellion against the pristine perfection of traditional photography. Infusing images with a dash of digital chaos, the glitch effect transforms the ordinary into the extraordinary, creating visually striking compositions that captivate the viewer’s imagination. In this extensive guide, we will embark on an immersive journey through the intricate steps of creating a cool glitch photo effect in Adobe Photoshop. From preparing your canvas to mastering glitch techniques, this comprehensive tutorial unveils the secrets behind this cutting-edge visual phenomenon.
Section 1: The Art of Glitching – Understanding the Aesthetic
Before delving into the technicalities of creating a glitch photo effect, it’s essential to grasp the aesthetic essence of glitches. Glitches are unexpected deviations or malfunctions in the normal flow of digital data, resulting in distortions, artifacts, and unexpected visual anomalies. This intentional disruption of visual harmony introduces an element of unpredictability, adding a rebellious and avant-garde quality to the final image.
The glitch photo effect is not about creating a flawless composition but about embracing the imperfections, embracing the unexpected, and celebrating the beauty within digital chaos.
Section 2: Setting the Stage – Preparing Your Canvas
The journey to creating a cool glitch photo effect begins with setting up a canvas that provides the foundation for experimentation. Open Adobe Photoshop and create a new document with dimensions that suit your artistic vision. Consider the desired resolution based on the intended use – whether it’s for digital illustration, print, or online platforms.
Choose a background color that complements the mood you wish to convey through your glitch photo effect. A neutral or contrasting background can enhance the visibility of glitches, allowing them to stand out and become the focal point of your composition. As you embark on this artistic venture, the canvas becomes your playground for digital rebellion.
Section 3: Selecting the Right Image
The success of a glitch photo effect heavily relies on selecting the right base image. Opt for a photograph that features distinct elements, textures, and visual interest. Images with vibrant colors, strong contrasts, and unique compositions work particularly well for glitch effects.
Consider the mood and narrative you want to convey through your glitched creation. Whether it’s a dynamic and energetic vibe or a moody and introspective atmosphere, the base image sets the tone for the glitch photo effect.
Section 4: Duplicating Layers for Experimentation
To preserve the integrity of your original image and facilitate experimentation, duplicate the base image layer. This duplication serves as a safety net, allowing you to explore glitch effects without permanently altering the original photograph. Rename the duplicated layer, providing a clear distinction between the base image and the glitch experimentation layer.
Throughout the glitch creation process, periodically duplicate the layers to capture different stages of the glitch effect. This approach enables you to revisit specific glitch iterations or explore alternative directions without losing the progress made.
Section 5: Channeling the Chaos – Understanding RGB Channels
The essence of glitch effects often lies within the manipulation of RGB channels. In Adobe Photoshop, an image is composed of three color channels – Red, Green, and Blue. By selectively disrupting or distorting these channels, you introduce visual irregularities that manifest as glitches. Understanding the behavior of RGB channels is crucial for crafting a convincing and aesthetically pleasing glitch photo effect.
Experiment with manipulating individual channels by accessing the Channels panel. Use tools like the Move, Stretch, or Warp tools to distort channel elements, introducing unexpected shifts in color and texture.
Section 6: Introducing Color Aberrations with Channel Splitting
Channel splitting is a powerful technique that introduces color aberrations and misalignments within the glitch photo effect. Selectively separate and offset RGB channels to create surreal color shifts and distortions. To achieve this effect:
- Navigate to the Channels panel.
- Select each channel individually (Red, Green, and Blue).
- Duplicate each channel by dragging it onto the “New Channel” icon.
- Use the Move tool to shift duplicated channels horizontally or vertically.
Experiment with different degrees of displacement for each channel, creating a visually dynamic and disorienting glitch effect.
Section 7: Distorting the Image with Displacement Maps
To elevate your glitch photo effect, employ displacement maps to introduce controlled distortions. Displacement maps utilize grayscale images to dictate the direction and intensity of distortions within the glitch effect. Follow these steps to integrate displacement maps into your glitch creation:
- Create a new layer and fill it with a grayscale noise pattern.
- Save the noise layer as a separate file.
- Apply the Displace filter to your glitch experimentation layer.
- Select the saved grayscale noise pattern as the displacement map.
Adjust the settings to control the magnitude and direction of distortions. This technique mimics the unpredictable nature of glitches, adding an extra layer of complexity to your glitched composition.
Section 8: Embracing Pixel Sorting for Dynamic Visual Impact
Pixel sorting is a cutting-edge technique that introduces a dynamic and fragmented aesthetic to your glitch photo effect. This process involves manipulating pixel sequences within the image, creating a sense of fragmentation and disintegration. To incorporate pixel sorting:
- Duplicate your glitch experimentation layer.
- Apply a pixel sorting filter or use specialized pixel sorting software.
- Experiment with different sorting algorithms and parameters.
- Overlay or blend the sorted layer with the original glitch experimentation layer.
Pixel sorting introduces a controlled anarchy, breaking down the visual coherence of the image and fostering a sense of digital rebellion.
Section 9: Amplifying Glitches with Overlay Blending Modes
Overlay blending modes serve as a powerful tool for intensifying glitch effects within your composition. Apply overlay blending modes to glitch experimentation layers, enhancing the vibrancy and contrast of glitches against the background. This step contributes to the visual impact of glitches, making them more pronounced and visually arresting.
Experiment with other blending modes such as Screen, Multiply, or Color Dodge to discover unique interactions between glitches and the underlying image.
Section 10: Crafting VHS Distortions for Retro Vibes
To infuse a touch of retro nostalgia into your glitch photo effect, incorporate VHS distortions reminiscent of old analog tapes. Create a new layer and fill it with random horizontal lines or patterns. Apply motion blur or Gaussian blur to simulate the imperfections inherent in VHS recordings.
Overlay the VHS distortion layer onto your glitch experimentation layers, adjusting the opacity to achieve a subtle retro effect. This technique adds a vintage flair to your glitch creation, bridging the gap between digital chaos and analog charm.
Section 11: Adding Textural Anomalies with Noise Filters
Introduce textural anomalies and disturbances by incorporating noise filters into your glitch photo effect. Create a new layer and fill it with a monochromatic noise pattern. Experiment with different noise intensities, scales, and distributions to achieve the desired level of texture.
Overlay or blend the noise layer with your glitch experimentation layers, contributing to the overall grit and complexity of the glitched composition. This step adds a tactile quality to the visual anomalies, enhancing the immersive nature of the glitch effect.
Section 12: Enhancing Glitch Elements with Light Leaks
To accentuate specific glitch elements or create focal points within your composition, integrate light leaks reminiscent of analog photography. Create new layers and apply gradient or brush strokes with vibrant colors, mimicking the appearance of light leaks. Experiment with blending modes and opacities to seamlessly merge the light leaks with the glitched layers.
Strategically position light leaks to draw attention to key areas of the image, adding a touch of drama and visual interest to the overall glitch photo effect.
Section 13: Distorted Typography for Narrative Impact
Infuse narrative impact into your glitch photo effect by incorporating distorted typography. Select meaningful phrases, quotes, or words, and apply text layers onto your glitch experimentation layers. Experiment with font styles, sizes, and orientations to create visually arresting typographic elements.
Apply displacement maps or distortion filters to the text layers, aligning them with the overall glitch aesthetic. The juxtaposition of distorted typography against glitched imagery introduces a storytelling element, inviting viewers to explore layers of meaning within the composition.
Section 14: Animated Glitch Art with GIF Creation
Elevate your glitch photo effect to a dynamic level by transforming it into an animated GIF. Photoshop allows you to create captivating animations by sequencing glitch frames. Follow these steps to animate your glitch creation:
- Open the Timeline panel in Photoshop.
- Create a frame animation.
- Duplicate glitch frames and introduce slight variations in glitch effects.
- Adjust frame timings for a fluid and dynamic animation.
Animating your glitch photo effect adds an extra dimension to the visual experience, allowing viewers to witness the dynamic evolution of glitches over time.
Section 15: Fine-Tuning and Balancing Elements
As you approach the final stages of your glitch photo effect, dedicate time to fine-tuning and balancing the elements within the composition. Assess the overall distribution of glitches, the intensity of distortions, and the harmony of colors. Use adjustment layers, layer masks, and brushes to refine any areas that may need attention.
This meticulous process ensures that every aspect of your glitch photo effect contributes to a cohesive and visually compelling final result.
Section 16: Adding Finishing Touches
Elevate your glitch photo effect with subtle finishing touches that enhance its overall impact. Experiment with color grading, vignettes, or lens flares to infuse a cinematic quality. These enhancements can add a polished and professional touch to your glitched composition, creating a visually arresting masterpiece.
Consider the scale and intensity of the finishing touches, ensuring they complement the rebellious and avant-garde nature of the glitch effect.
Section 17: Saving and Exporting Your Glitch Photo Effect
Once satisfied with the final result of your glitch photo effect, it’s time to save and export your creation. Save your Photoshop project file (.PSD) to retain all layers and editable elements for future adjustments. Additionally, export your glitched composition in a suitable format for your intended use, such as JPEG, PNG, or GIF.
Optimize the file size while preserving image quality, especially if your glitch photo effect is intended for digital platforms or social media. For print projects, ensure that your exported file meets the resolution requirements for high-quality reproduction.
Section 18: Showcasing Your Glitch Photo Effect
Celebrate your foray into the realm of digital anarchy by showcasing your glitch photo effect. Share it on social media, incorporate it into your portfolio, or submit it to digital art communities. Engage with fellow artists, seek constructive feedback, and let your glitch creation become a testament to the rebellious spirit that thrives within the intersection of technology and creativity.
Consider creating variations or exploring different themes with the glitch photo effect concept. Each iteration allows for new artistic discoveries and expands the possibilities of this cutting-edge visual phenomenon.
Conclusion:
Crafting a cool glitch photo effect in Adobe Photoshop is a journey of creative rebellion, where the chaos of digital imperfections converges with the artistry of intentional distortions. From manipulating RGB channels to introducing VHS distortions, each step in this comprehensive guide contributes to the alchemy of transforming a conventional image into a visually striking masterpiece.
Whether you’re a seasoned digital artist or an enthusiastic beginner, the process of creating a glitch photo effect invites you to defy conventions and embrace the unexpected. Let the rebellious spirit of glitches guide your artistic exploration, and may your glitched composition stand as a testament to the boundless possibilities of visual expression within the digital realm. Unleash digital anarchy, and let your glitch photo effect captivate and inspire in the ever-evolving landscape of contemporary art.


