Navigating System Revisions: A Comprehensive Guide on How to Roll Back Windows 10 Creators Update to a Prior Version
Introduction:
Windows 10, Microsoft’s dynamic operating system, undergoes periodic updates to introduce new features, enhance security, and improve overall performance. While these updates are generally designed to enhance the user experience, there are instances where users may encounter compatibility issues, bugs, or other unforeseen problems after a major update, such as the Creators Update. In this extensive guide, we will explore the intricate process of rolling back Windows 10 Creators Update to a prior version, allowing users to revert to a more stable system configuration and address any challenges that may have arisen post-update.
Understanding Windows 10 Creators Update:
The Windows 10 Creators Update, released in April 2017, introduced a range of features and enhancements, including 3D content creation, improved gaming experiences, and enhanced privacy settings. While the update aimed to elevate the user experience, not all users may find the changes suitable for their specific needs or hardware configurations. In cases where issues arise post-update, rolling back to a prior version of Windows 10 becomes a valuable option.
Step 1: Assessing the Need for Rollback:
Before initiating the rollback process, it’s crucial to assess the reasons behind the decision. Consider factors such as compatibility issues, software conflicts, or unforeseen bugs that may be impacting your system’s performance. Verify that rolling back to a prior version is the most suitable solution for addressing the challenges you’re facing.
Step 2: Backup Essential Data:
Rolling back Windows 10 to a prior version involves significant changes to your system configuration. To safeguard your data and files, it is imperative to create a comprehensive backup. Back up essential documents, images, and any other important data to an external drive or cloud storage solution to prevent potential data loss during the rollback process.
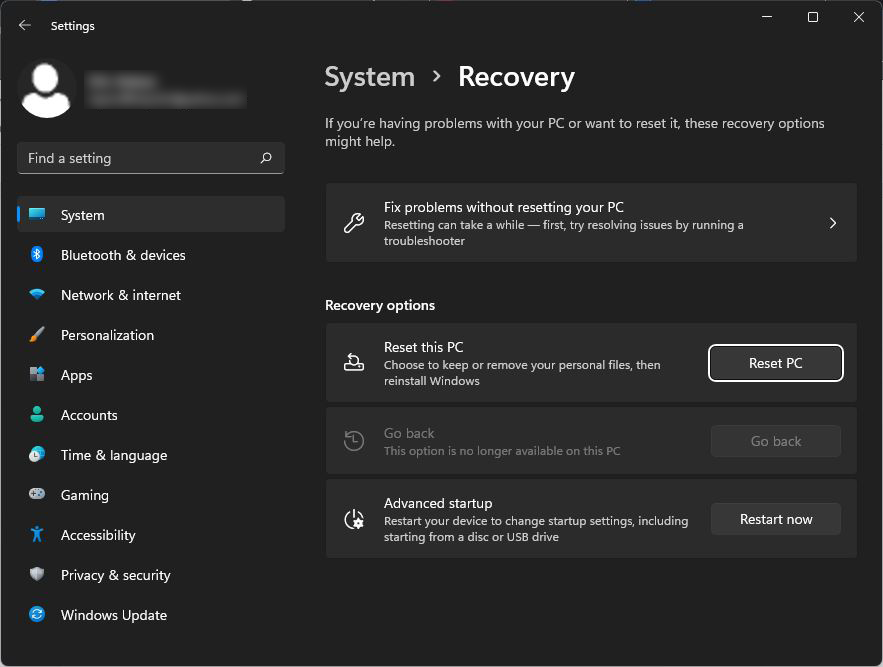
Step 3: Accessing Recovery Options:
To initiate the rollback process, access the Recovery options in Windows 10. Press the Windows key + I to open the Settings app. From the Settings menu, select “Update & Security,” and then choose “Recovery” from the left sidebar. Here, you will find various recovery options, including the ability to roll back to a prior version.
Step 4: Choosing ‘Go back to the previous version of Windows’:
Within the Recovery options, locate the section titled “Go back to the previous version of Windows 10.” If this option is available, it indicates that your system is within the rollback window, typically limited to 10 days after a major update. Click on the “Get started” button to initiate the rollback process.
Step 5: Providing Rollback Feedback (Optional):
As part of the rollback process, Windows 10 may prompt you to provide feedback about why you’re choosing to revert to a prior version. While this step is optional, providing feedback can be valuable for Microsoft in improving future updates. Select the relevant options and click “Next” to proceed.
Step 6: Confirming the Rollback:
Windows will display a summary of the rollback process, including a reminder to back up important files. Confirm that you have completed the necessary backups and click “Next” to proceed with the rollback. The process may take some time as Windows reinstalls the previous version.
Step 7: Monitoring the Rollback:
Once the rollback process is initiated, your system will go through several stages, including uninstalling the Creators Update and reinstalling the prior version of Windows 10. Monitor the progress, and your system may restart multiple times during this process.
Step 8: Verifying the Rollback:
After the rollback is complete, log in to your system and verify that you are now running the prior version of Windows 10. Access the Settings app, go to “System,” and click on “About” to confirm the version of Windows installed.
Step 9: Post-Rollback Considerations:
Following the successful rollback, it’s essential to assess whether the issues prompting the rollback have been resolved. Monitor system performance, check for software compatibility, and ensure that your essential applications and hardware devices function as expected.
Conclusion:
Rolling back Windows 10 Creators Update to a prior version is a strategic decision aimed at addressing compatibility issues, bugs, or other challenges that may arise post-update. By following the comprehensive guide outlined above, users can navigate the Recovery options, initiate the rollback process, and restore their system to a more stable configuration. Whether prompted by software conflicts, compatibility concerns, or unforeseen bugs, the ability to roll back Windows 10 provides users with the flexibility to tailor their computing environment to meet their specific needs. Embrace the power of system revisions, troubleshoot effectively, and ensure that your Windows 10 experience aligns seamlessly with your preferences and requirements.


