Mastering Tone and Color Correction: A Comprehensive Guide to Fixing Tone and Color with Levels in Photoshop
Introduction:
Achieving optimal tone and color in your images is fundamental to producing visually stunning photographs. Color correction involves adjusting the overall color balance, while tone correction focuses on the distribution of brightness levels. Adobe Photoshop, a powerhouse in digital image editing, offers a robust tool called Levels that allows photographers and digital artists to precisely fix tone and color imbalances. In this comprehensive guide, we will explore the intricate techniques and applications of using Levels in Photoshop to achieve impeccable tone and color correction.
I. Understanding Tone and Color Correction:
Tone and color correction are essential steps in the post-processing workflow, ensuring that the final image accurately reflects the photographer’s vision. Tone correction involves adjustments to the distribution of light and dark tones in an image, while color correction addresses the overall color balance, eliminating unwanted color casts.
A. Importance of Tone Correction:
- Dynamic Range Enhancement: Tone correction expands the dynamic range of an image, optimizing the distribution of highlights, midtones, and shadows.
- Detail Enhancement: Proper tone correction brings out details in both highlight and shadow areas, resulting in a more visually balanced and appealing photograph.
B. Significance of Color Correction:
- Accurate Color Representation: Color correction ensures that colors in the image are true to life and free from unwanted color casts.
- Consistent Color Balance: Maintaining a consistent color balance across an image contributes to visual harmony and cohesiveness.
II. Introduction to Levels in Photoshop:
Levels is a versatile and powerful adjustment tool in Photoshop that allows for precise control over the tonal and color balance of an image. By adjusting the black, white, and midtone points, photographers can fine-tune the overall exposure and color balance.
A. Accessing the Levels Adjustment:
- Open your image in Photoshop.
- Navigate to the “Image” menu, select “Adjustments,” and choose “Levels.”
- The Levels dialog box will appear, displaying a histogram representing the tonal distribution in the image.
B. Components of the Levels Histogram:
- Left Slider (Blacks): Adjusting the left slider sets the black point, defining the darkest point in the image.
- Middle Slider (Midtones): The middle slider adjusts the midtones, affecting the overall brightness level of the image.
- Right Slider (Whites): Adjusting the right slider sets the white point, defining the lightest point in the image.
- Histogram Peaks: Peaks and valleys in the histogram indicate the distribution of tones. Clipped areas at the edges suggest loss of detail in highlights or shadows.
III. Fixing Tone with Levels:
Tone correction using Levels involves setting the black, white, and midtone points to achieve the desired balance of brightness levels in the image.
A. Setting the Black Point:
- Drag the left (black) slider to the right until it aligns with the beginning of the histogram.
- This defines the black point, enhancing contrast by ensuring that the darkest tones in the image are represented.
B. Adjusting Midtones:
- Fine-tune midtones by adjusting the middle slider.
- Sliding to the left darkens midtones, while sliding to the right lightens them.
C. Setting the White Point:
- Drag the right (white) slider to the left until it aligns with the end of the histogram.
- This defines the white point, ensuring that the lightest tones in the image are represented.
D. Balancing RGB Channels:
- Switch to individual RGB channels in the Levels dialog to fine-tune color balance.
- Adjust the black, white, and midtone sliders for each channel to correct color imbalances.
IV. Correcting Color with Levels:
Color correction using Levels involves addressing color imbalances and ensuring a consistent color representation throughout the image.
A. Addressing Color Casts:
- Observe the overall color tone of the image.
- If a color cast is present, use the individual RGB channels in Levels to adjust the midtone sliders for each channel.
- Balancing the RGB channels helps neutralize color casts and achieve a more accurate color representation.
B. Using the Eyedropper Tool for Color Correction:
- Click on the Eyedropper Tool within the Levels dialog.
- Click on a neutral gray area in the image to set it as a reference point for color correction.
- Photoshop adjusts the color balance based on the selected reference point.
V. Advanced Techniques with Levels:
For users seeking more nuanced control and advanced techniques, explore additional features and functionalities within Levels.
A. Utilizing Output Levels:
- In the Levels dialog, the Output Levels sliders control the tonal range of shadows and highlights.
- Adjusting the output levels can be useful for fine-tuning contrast and achieving a desired tonal balance.
B. Applying Adjustment Layers for Non-Destructive Editing:
- Instead of applying Levels directly to the image, use Levels adjustment layers for non-destructive editing.
- Adjustment layers allow for easy revisions and fine-tuning without affecting the original image.
C. Integrating Levels with Other Adjustment Layers:
- Combine Levels adjustments with other adjustment layers, such as Curves or Hue/Saturation, for a comprehensive approach to image enhancement.
- This integrated approach allows for precise control over tone and color in specific areas of the image.
VI. Real-World Applications: Examples and Case Studies:
To illustrate the practical application of tone and color correction using Levels in Photoshop, let’s explore real-world examples across different photographic scenarios.
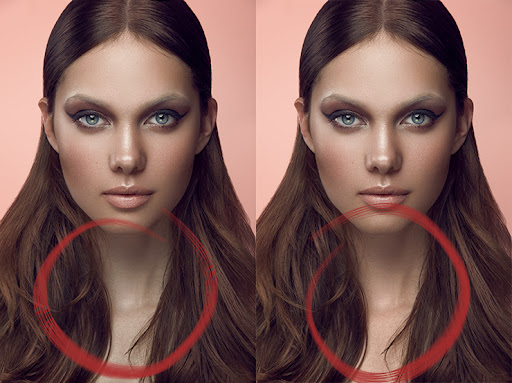
A. Portrait Retouching with Levels:
- Correcting skin tones and achieving a natural color balance in portrait photography.
- Fine-tuning the black and white points to enhance facial details without compromising skin tones.
B. Landscape Photography Tone Correction:
- Adjusting the tonal range to bring out details in both highlights and shadows in landscape images.
- Balancing the color tones to ensure accurate representation of natural elements such as skies, foliage, and water.
C. Product Photography Color Correction:
- Ensuring consistent color balance across product images for a cohesive and professional appearance.
- Neutralizing color casts and fine-tuning midtones to highlight product details.
VII. Best Practices and Tips for Effective Tone and Color Correction:
To optimize your tone and color correction workflow, consider incorporating these best practices and tips when using Levels in Photoshop.
A. Regularly Check Histogram for Clipping:
- Monitor the histogram while adjusting Levels to avoid clipping in highlights or shadows.
- Clipping results in loss of detail and can lead to undesirable artifacts.
B. Use Adjustment Layers for Non-Destructive Editing:
- Apply Levels adjustments as adjustment layers for non-destructive editing.
- This allows for flexibility and easy revisions without altering the original image.
C. Experiment with Individual RGB Channels:
- Explore the impact of adjusting individual RGB channels for fine-tuned color correction.
- Understanding the contribution of each channel enhances control over color balance.
D. Combine Levels with Other Adjustment Layers:
- Integrate Levels adjustments with other adjustment layers for a comprehensive approach.
- Experiment with Curves, Hue/Saturation, or Color Balance to achieve nuanced and targeted corrections.
VIII. Conclusion:
Mastering tone and color correction with Levels in Photoshop is an essential skill for photographers and digital artists seeking to enhance the visual appeal and accuracy of their images. The precision and versatility offered by Levels empower users to address tonal imbalances, correct color casts, and achieve a harmonious and professional look. As you incorporate Levels into your image editing toolkit, remember that practice, experimentation, and a discerning eye are key components of achieving optimal results. Transform your images, elevate their tonal and color qualities, and create visual narratives that captivate and resonate with authenticity. Explore, refine, and let your creativity flourish as you harness the power of Levels to bring out the full potential of your photographic masterpieces.


