Mastering the Picture-in-Picture Effect in HitFilm Express: A Comprehensive Guide
The picture-in-picture effect, also known as PIP, is a popular technique used in video editing to display multiple video clips or images simultaneously within the same frame. This dynamic effect adds visual interest, enhances storytelling, and enables creative storytelling possibilities. HitFilm Express, a powerful and versatile video editing software, offers a range of tools and features to easily create picture-in-picture effects. In this comprehensive guide, we’ll delve into the intricacies of creating picture-in-picture effects in HitFilm Express, exploring techniques, workflows, and expert tips to help you master this dynamic editing technique and elevate your video projects.
Understanding the Picture-in-Picture Effect
Before we delve into the practical aspects, let’s first understand the concept and significance of the picture-in-picture effect. The picture-in-picture effect involves overlaying one video or image on top of another, creating a smaller inset window within the main video frame. This inset window, known as the “picture-in-picture,” can display additional content such as a secondary video clip, a logo, or supplementary visuals. The picture-in-picture effect is commonly used in tutorials, presentations, and video montages to provide context, emphasize key points, or showcase multiple perspectives simultaneously.
Step-by-Step Guide to Creating Picture-in-Picture Effects in HitFilm Express
- Import Your Footage: Begin by importing the video clips or images you wish to use for the picture-in-picture effect into HitFilm Express. Organize your media in the media bin for easy access.
- Create a New Project: Open a new project timeline in HitFilm Express and drag the main video clip onto the timeline. This will serve as the background for your picture-in-picture effect.
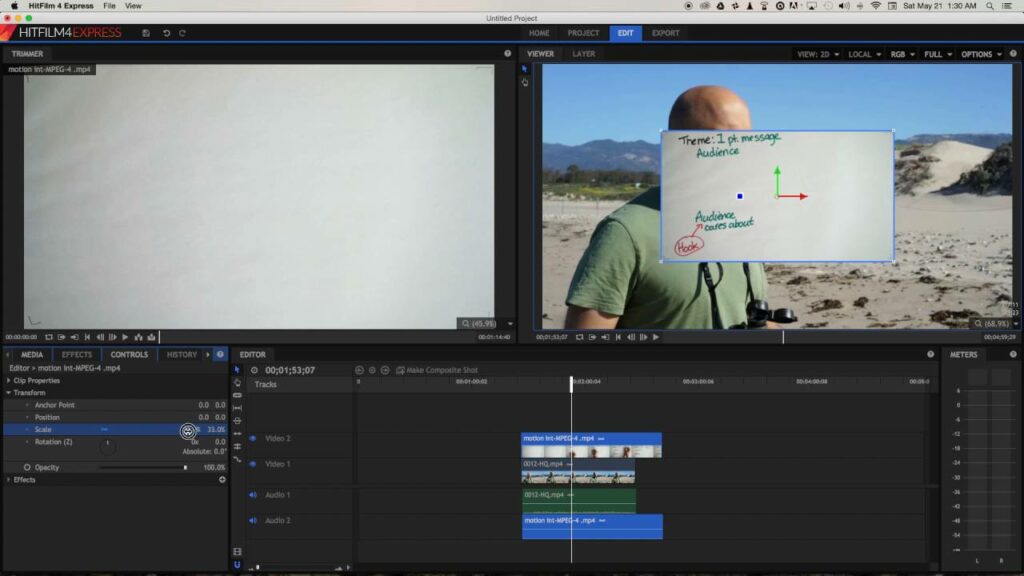
- Add the Secondary Footage: Drag the secondary video clip or image onto the timeline above the main video clip. Position it on a separate video track to ensure it appears on top of the main video.
- Resize and Position the Secondary Footage: With the secondary footage selected, use the transform controls in the viewer window to resize and reposition it within the frame. Adjust the size and position of the inset window to achieve the desired composition.
- Adjust Opacity (Optional): Depending on your preferences and the desired visual style, you may choose to adjust the opacity of the secondary footage to make it more transparent. This can help blend the inset window seamlessly into the main video frame.
- Animate the Inset Window (Optional): To add movement or animation to the picture-in-picture effect, you can keyframe the position, scale, or rotation of the secondary footage over time. Use the keyframe controls in HitFilm Express to set keyframes at different points in the timeline and adjust the properties accordingly.
- Add Borders or Frames (Optional): Enhance the visual appeal of the picture-in-picture effect by adding borders or frames around the inset window. You can use shape layers, masks, or overlay graphics to create custom borders that complement your video content.
- Apply Effects (Optional): Experiment with different effects and filters to further enhance the picture-in-picture effect. You can add color correction, blur, glow, or other visual effects to the secondary footage to create unique looks and styles.
- Preview and Refine: Continuously preview your picture-in-picture effect in HitFilm Express to assess its visual impact. Make adjustments to the size, position, animation, or effects as needed to achieve the desired result.
- Export Your Project: Once satisfied with your picture-in-picture effect, export your project in the desired format for distribution or further editing. Choose the appropriate output settings to ensure optimal video quality and compatibility with your intended playback platform.
Tips and Best Practices for Picture-in-Picture Effects
- Maintain Visual Balance: When creating picture-in-picture effects, pay attention to the composition and balance of elements within the frame. Ensure that the secondary footage does not overwhelm or distract from the main video content.
- Use Keyframes for Animation: Keyframing allows for precise control over the movement and animation of the inset window. Experiment with different easing curves and timing intervals to create smooth and natural-looking animations.
- Consider Audio Integration: If your picture-in-picture effect includes audio, ensure that audio elements are synchronized and balanced across both the main video and the inset window. Pay attention to audio levels and transitions to maintain a seamless auditory experience.
- Experiment with Layouts: Don’t be afraid to experiment with different layouts and arrangements for your picture-in-picture effects. Explore variations in size, position, and orientation to find the most visually compelling composition.
- Stay Organized: As your project grows in complexity, it’s important to stay organized and maintain a tidy project structure. Use naming conventions, layer labels, and folders to keep track of video tracks, effects, and other elements.
Conclusion
The picture-in-picture effect is a versatile editing technique that offers endless creative possibilities in video production. With HitFilm Express as your tool of choice, you have the power to bring your picture-in-picture visions to life with ease and precision. By following the steps outlined in this guide and embracing best practices, you’ll be well-equipped to create dynamic and engaging picture-in-picture effects that captivate and resonate with your audience. So, unleash your creativity, experiment fearlessly, and let HitFilm Express be your canvas for expressive and impactful video editing.


