Mastering the Art of Video Editing: A Comprehensive Guide to Editing Your YouTube Videos with Adobe Premiere Pro
In the dynamic world of YouTube content creation, video editing is a fundamental skill that can elevate the quality, storytelling, and visual appeal of your videos. Whether you’re a vlogger, filmmaker, educator, or aspiring content creator, mastering the art of video editing opens up a world of creative possibilities and enables you to bring your vision to life on screen. Adobe Premiere Pro stands as one of the industry-standard video editing software, offering a comprehensive suite of tools and features to help you edit, enhance, and polish your videos to perfection.
In this extensive guide, we will embark on a journey through the art and science of editing your YouTube videos with Adobe Premiere Pro, exploring a myriad of techniques, tips, and best practices to help you unlock the full potential of this powerful software. From importing and organizing footage to applying effects and transitions, this guide will equip you with the knowledge and skills needed to edit your videos like a pro and captivate your audience with engaging and polished content.
Understanding the Power of Adobe Premiere Pro
Before diving into the intricacies of video editing with Adobe Premiere Pro, it’s essential to understand why this software is such a valuable asset for content creators. Here are some key benefits of using Adobe Premiere Pro for editing YouTube videos:
- Comprehensive Editing Tools: Adobe Premiere Pro offers a wide range of editing tools and features, including timeline-based editing, multi-camera support, advanced audio mixing, and more. Whether you’re a beginner or an experienced editor, Premiere Pro provides the flexibility and control you need to edit your videos with precision and creativity.
- Seamless Integration with Creative Cloud: As part of Adobe Creative Cloud, Premiere Pro seamlessly integrates with other Adobe applications such as Photoshop, After Effects, and Audition. This integration allows for smooth workflow interoperability, enabling you to easily import assets, create visual effects, and fine-tune audio within a unified creative environment.
- Professional-Grade Performance: Adobe Premiere Pro is optimized for professional-grade performance, with support for high-resolution video formats, GPU acceleration, and real-time playback. Whether you’re editing 4K footage, applying complex effects, or rendering large projects, Premiere Pro delivers smooth, responsive performance to keep your workflow moving forward.
- Industry-Standard Software: Adobe Premiere Pro is widely recognized as an industry-standard video editing software used by filmmakers, editors, and content creators around the world. By mastering Premiere Pro, you gain valuable skills and expertise that are highly sought after in the industry.
Steps to Editing Your YouTube Videos with Adobe Premiere Pro
Now that we’ve established the power of Adobe Premiere Pro let’s explore the steps involved in editing your YouTube videos with this software:
1. Import and Organize Footage
Start by importing your video footage, audio files, and other assets into Adobe Premiere Pro. Organize your media files into bins or folders to keep your project well-structured and easy to navigate. Follow these steps:
- Create a New Project: Launch Premiere Pro and create a new project. Choose a location to save your project files and set project settings such as video resolution, frame rate, and audio format.
- Import Media: Import your video clips, audio files, images, and other assets into the project panel. You can either drag and drop files directly into the project panel or use the File > Import option to browse for files on your computer.
- Organize Media: Create bins or folders in the project panel to organize your media files. Use descriptive names and categories to keep your project organized and easy to navigate.
2. Assemble and Arrange Clips on the Timeline
Once you’ve imported and organized your footage, it’s time to assemble and arrange your clips on the timeline. Follow these steps:
- Create a Sequence: Right-click on a video clip in the project panel and select “New Sequence From Clip” to create a sequence that matches the settings of your video footage.
- Arrange Clips: Drag and drop video clips from the project panel onto the timeline to arrange them in the desired order. Use the razor tool (C) to trim and cut clips, and the selection tool (V) to move and rearrange them on the timeline.
- Add Transitions: Apply transitions such as cuts, fades, and dissolves between clips to create smooth transitions and maintain continuity between scenes. Drag and drop transitions from the effects panel onto the timeline between clips.
3. Edit and Enhance Your Footage
With your clips arranged on the timeline, it’s time to edit and enhance your footage using Adobe Premiere Pro’s editing tools and features. Consider the following techniques:
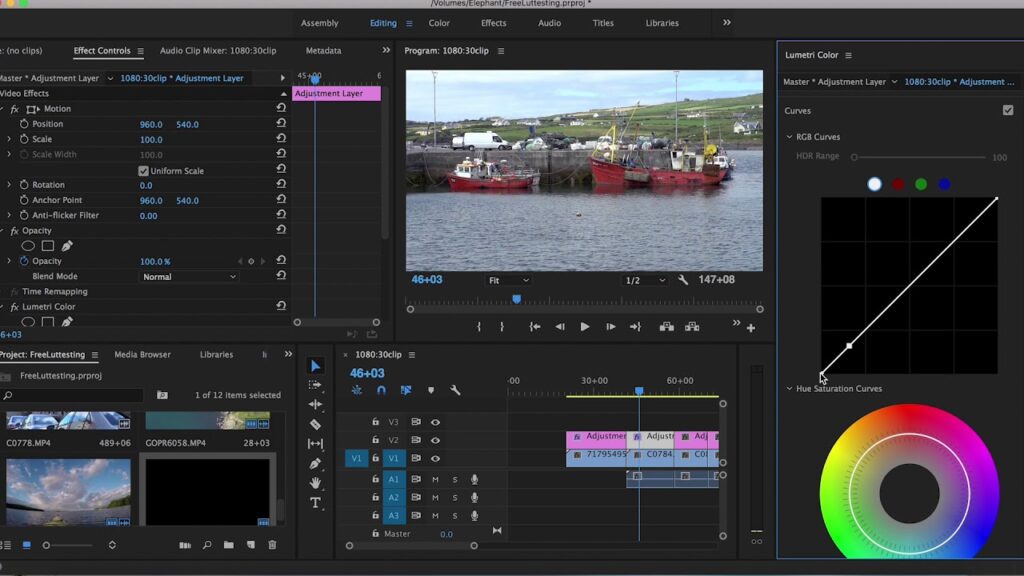
- Color Correction and Grading: Use the Lumetri Color panel to adjust color balance, contrast, saturation, and other color parameters to enhance the visual appeal and consistency of your footage.
- Audio Mixing and Effects: Use the audio track mixer to adjust volume levels, apply audio effects, and create a balanced mix of music, dialogue, and sound effects. Use audio keyframes to automate volume changes and transitions.
- Text and Graphics: Add text, titles, and graphics to your videos to provide context, convey information, and engage your audience. Use the essential graphics panel to create and customize text and graphic overlays.
4. Apply Visual Effects and Motion Graphics
Adobe Premiere Pro offers a wide range of visual effects and motion graphics tools to add creative flair and style to your videos. Consider the following techniques:
- Keyframe Animation: Use keyframes to animate properties such as position, scale, rotation, and opacity to create dynamic motion graphics and visual effects.
- Video Effects: Apply video effects such as blurs, glows, and distortions to enhance the look and style of your footage. Experiment with different effects and adjustment layers to achieve the desired visual impact.
- Green Screen (Chroma Key): Use the ultra key effect to remove green or blue screen backgrounds and replace them with alternate backgrounds or visuals. This technique is commonly used for compositing and creating visual effects.
5. Export and Share Your Finished Video
Once you’ve finished editing your video, it’s time to export and share it with your audience. Follow these steps:
- Review and Playback: Review your video playback in the program monitor to ensure that all edits, effects, and transitions are applied correctly and that the video meets your quality standards.
- Export Settings: Go to File > Export > Media to access the export settings dialog box. Choose the desired format, codec, resolution, and other export settings based on your intended use for the video.
- Export Options: Customize export options such as bitrate, encoding settings, and output destination. Preview the estimated file size and duration to optimize settings for online sharing or distribution.
Best Practices and Considerations
As you edit your YouTube videos with Adobe Premiere Pro, keep the following best practices and considerations in mind:
- Organization: Stay organized by labeling and grouping your assets, using markers and labels, and maintaining a tidy project structure.
- Efficiency: Use keyboard shortcuts, presets, and templates to streamline your workflow and save time during editing.
- Experimentation: Don’t be afraid to experiment with different editing techniques, effects, and styles to discover your unique creative voice and style.
- Feedback: Seek feedback from peers, mentors, or collaborators to gain fresh perspectives and identify areas for improvement in your editing.
Conclusion
Editing your YouTube videos with Adobe Premiere Pro is an empowering and creative process that allows you to bring your vision to life on screen. By mastering Premiere Pro’s editing tools and features, you can edit, enhance, and polish your videos to professional standards and captivate your audience with engaging and visually stunning content.
Remember that video editing is as much an art as it is a science, and practice makes perfect. Stay curious, stay creative, and stay committed to honing your editing skills and refining your craft over time. With dedication, passion, and a keen eye for detail, you can create YouTube videos that resonate with your audience and leave a lasting impression.
So, fire up Adobe Premiere Pro, unleash your creativity, and embark on the exhilarating journey of video editing. With each cut, each effect, and each adjustment, you’re one step closer to creating videos that inspire, entertain, and connect with viewers around the world. Happy editing!


