Mastering Motion Blur: A Comprehensive Guide to Creating Dynamic Visuals in Photoshop
Introduction:
In the dynamic realm of digital design, the motion blur effect stands as a versatile and captivating technique that breathes life into static images. Whether you’re looking to convey a sense of speed, simulate movement, or add a touch of cinematic flair, mastering motion blur in Photoshop opens up a world of creative possibilities. In this extensive guide, we will embark on a detailed exploration of the step-by-step process for achieving the motion blur effect in Photoshop, offering insights, tips, and tricks to elevate your design game.
Section 1: Understanding the Essence of Motion Blur
Before delving into the technicalities of creating motion blur, it’s essential to grasp the fundamental concept behind this effect. Motion blur simulates the streaking or blurring of objects in motion, capturing the dynamic essence of movement within a static image. This technique is widely employed in photography, graphic design, and digital art to convey a sense of speed, action, or fluidity.
Section 2: Selecting the Right Image
The success of a motion blur effect often hinges on selecting the right image. Not all photographs or graphics lend themselves equally well to this technique. Opt for images that feature elements in motion – whether it’s a speeding car, a running athlete, or flowing water. The more pronounced the movement in the original image, the more impactful the motion blur effect will be.
Section 3: Opening Your Image in Photoshop
Once you’ve selected the image that will serve as the canvas for your motion blur masterpiece, open it in Adobe Photoshop. Ensure that your software is up-to-date to access the latest features and tools that can enhance your motion blur workflow.
Section 4: Duplicating the Background Layer
Begin the motion blur process by creating a duplicate layer of your background image. This step is crucial for maintaining a non-destructive workflow, allowing you to experiment with various settings without altering the original image. Right-click on the background layer and select “Duplicate Layer” to create a copy.
Section 5: Accessing the Motion Blur Filter
With the duplicated layer selected, navigate to the “Filter” menu at the top of the Photoshop interface. Under the “Blur” submenu, choose “Motion Blur” to access the motion blur filter settings. The Motion Blur dialog box will appear, presenting you with options to control the direction, distance, and angle of the motion blur effect.
Section 6: Adjusting the Motion Blur Settings
Experiment with the motion blur settings to achieve the desired effect for your image. The “Angle” parameter allows you to specify the direction of the motion blur, aligning it with the movement in the original image. Adjust the “Distance” slider to control the intensity of the blur, determining how much streaking or blurring is applied to the moving elements.
Consider the visual impact you want to achieve – a subtle sense of motion may require a lower distance setting, while a dynamic action scene may benefit from a more pronounced motion blur effect.
Section 7: Applying Multiple Motion Blur Filters
For complex or multidirectional movement, you can apply multiple motion blur filters to different layers. Duplicate the blurred layer, adjust the angle and distance settings to align with other movement directions, and experiment with layer opacity to blend the effects seamlessly. This technique is particularly effective for scenes with diverse motion elements, such as a bustling urban street or a dynamic sports event.
Section 8: Masking and Fine-Tuning
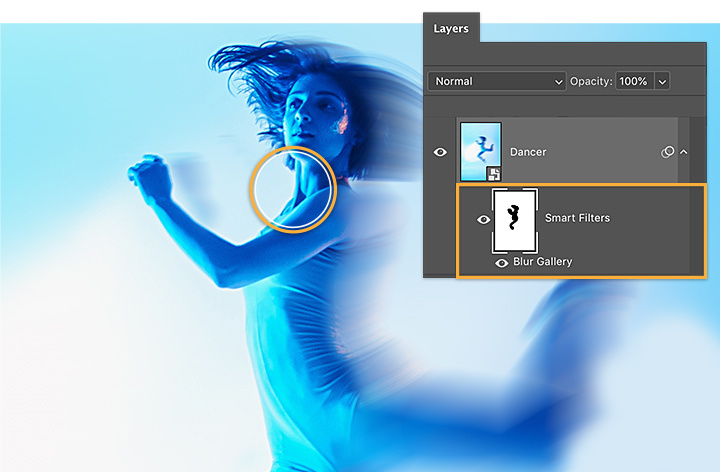
To refine the application of the motion blur effect, use layer masks to selectively control where the blur is applied. This step allows you to maintain sharpness in specific areas of the image while applying motion blur strategically. Use the Brush Tool with a soft edge to paint on the layer mask, revealing or concealing the blurred effect as needed.
Additionally, consider adjusting the opacity of individual layers to achieve a nuanced blend between the motion-blurred and sharp elements. This level of control ensures that your motion blur effect enhances the overall composition without sacrificing essential details.
Section 9: Simulating Speed with Radial Blur
For images featuring rotational movement or circular motion, the Radial Blur filter in Photoshop can simulate the sensation of speed. Duplicate the background layer, apply the Radial Blur filter (Filter > Blur > Radial Blur), and experiment with the amount and quality settings to achieve a compelling radial motion effect. This technique is particularly effective for conveying dynamic energy in scenes such as spinning wheels or swirling objects.
Section 10: Incorporating Motion Blur in Graphic Design
Motion blur isn’t limited to photography – it can also be a powerful tool in graphic design. Whether you’re designing a dynamic website banner, a promotional poster, or an attention-grabbing advertisement, motion blur can infuse a sense of vitality and movement into static visuals.
Experiment with incorporating motion blur into text elements, logos, or graphic elements to simulate a sense of motion or create a dynamic visual hierarchy. Apply the motion blur filter selectively to specific layers or elements, enhancing the overall visual impact of your graphic design composition.
Section 11: Creating Custom Motion Paths
Take your motion blur creativity to the next level by creating custom motion paths. Use the Pen Tool to draw a path along the trajectory of movement in your image. With the path selected, choose “Filter” > “Blur” > “Motion Blur” and adjust the settings to align with your custom path. This technique allows for precise control over the direction and intensity of the motion blur, enabling you to tailor the effect to the specific dynamics of your composition.
Section 12: Adding a Dynamic Background
To enhance the sense of motion in your image, consider adding a dynamic background that complements the motion blur effect. This step is particularly effective for scenes with a central moving element, such as a speeding car or a running athlete.
Create a new layer behind the motion-blurred layers and use brushes, gradients, or patterns to craft a background that visually reinforces the direction and energy of the movement. Experiment with blending modes and opacities to achieve a seamless integration between the motion blur effect and the dynamic background.
Section 13: Fine-Tuning Colors and Contrast
Motion blur can sometimes impact the perception of colors and contrast in an image. After applying the motion blur effect, take the time to fine-tune color balance, saturation, and contrast. Use adjustment layers, such as “Curves” or “Hue/Saturation,” to achieve a cohesive and visually appealing result.
Consider enhancing the vibrancy of colors or adjusting the overall tonal balance to ensure that the motion-blurred elements harmonize with the rest of the composition. This step contributes to the overall polish and professionalism of your design.
Section 14: Experimenting with Blend If and Layer Styles
To integrate the motion blur effect seamlessly with the underlying layers, experiment with the “Blend If” settings and layer styles in Photoshop. Double-click on a layer to access the Layer Style dialog box, where you can adjust the blending options to control how the motion blur interacts with the layers beneath it.
Utilize features such as “Blend If” sliders to refine the visibility of the motion blur effect based on luminosity or color. This step allows for precise control over the blending of the motion blur effect with other elements in your composition.
Section 15: Creating Animated Motion Blur in Photoshop
For digital artists exploring animation, Photoshop provides the capability to create animated motion blur effects. Convert your composition into a timeline by selecting “Window” > “Timeline.” Create a series of duplicate frames, gradually increasing the intensity of the motion blur in each frame. When played as an animation, this technique simulates the progression of movement over time, adding a dynamic element to your design.
Experiment with frame rates and durations to achieve the desired speed and fluidity in your animated motion blur. This approach is particularly effective for conveying continuous motion, such as a moving vehicle or a waving flag.
Section 16: Saving and Exporting Your Motion Blur Masterpiece
Once you’ve fine-tuned your motion blur effect to perfection, it’s time to save and export your masterpiece. Consider saving your Photoshop project file (.PSD) to retain all layers and editable elements for future adjustments. Additionally, export your motion-blurred image in a suitable format for your intended use, such as JPEG or PNG.
Optimize the file size while preserving image quality, especially if your motion-blurred image is intended for digital platforms or social media. For print projects, ensure that your exported file meets the resolution requirements for high-quality reproduction.
Section 17: Sharing and Showcasing Your Motion Blur Creations
Celebrate your mastery of motion blur by sharing and showcasing your creations with the creative community. Display your work on social media platforms, online portfolios, or as part of digital art communities. Encourage feedback, engage with fellow artists, and consider documenting your motion blur process to inspire others.
Experiment with variations, explore different scenarios, and apply motion blur in unexpected ways to push the boundaries of your creativity. Motion blur is a dynamic tool that can be harnessed for a wide range of visual effects, from subtle enhancements to bold statements. By sharing your motion blur creations, you contribute to the collective exploration of this versatile technique within the digital art landscape.
Conclusion:
Mastering the motion blur effect in Photoshop is a journey that invites digital artists to infuse static images with the energy and dynamism of movement. From understanding the essence of motion blur to applying custom paths, incorporating dynamic backgrounds, and exploring animation, this comprehensive guide has unraveled the intricacies of creating captivating motion-blurred visuals.
Whether you’re a photographer looking to convey the speed of a moving subject, a graphic designer aiming to add a sense of vitality to static elements, or a digital artist pushing the boundaries of visual storytelling, motion blur in Photoshop is a powerful tool at your disposal. Embrace the possibilities, experiment with creativity, and let the fluidity of motion blur breathe life into your digital canvas. The world is in motion, and with Photoshop, you have the means to capture and convey its dynamic essence in every pixel.
