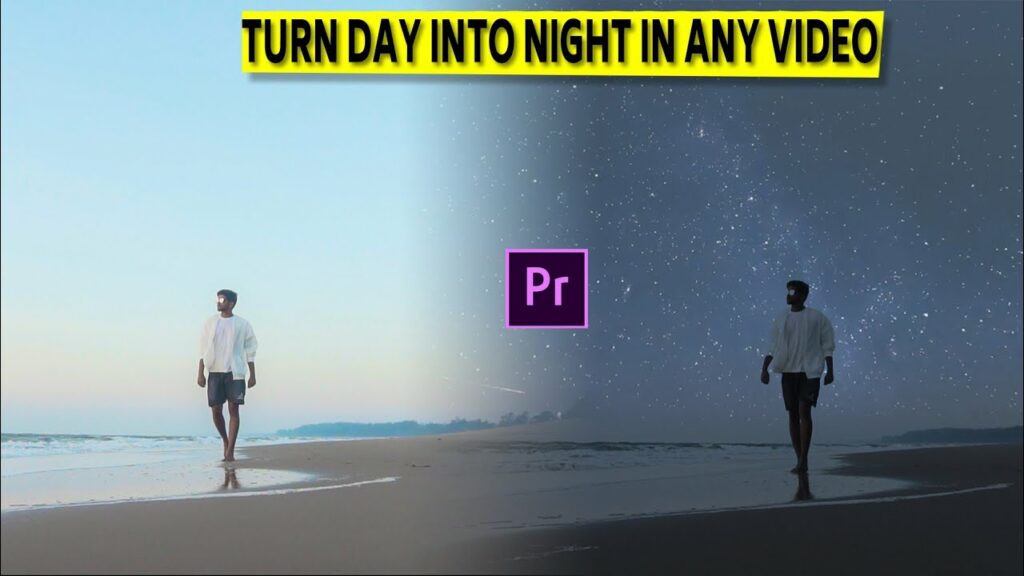
Mastering Day-to-Night Time-Lapse: A Comprehensive Guide on How to Create Day-to-Night Time-Lapse Videos in Adobe Premiere Pro
Introduction: Day-to-night time-lapse videos are captivating visual narratives that showcase the transformation of a scene from daylight to nighttime. This technique allows filmmakers and videographers to capture the dynamic changes in light, color, and mood over an extended period, condensing hours of footage into a few seconds or minutes. Adobe Premiere Pro, a leading video editing software, offers users powerful tools and features to create stunning day-to-night time-lapse videos with ease. In this comprehensive guide, we will explore the step-by-step process of creating day-to-night time-lapse videos in Adobe Premiere Pro, from capturing the footage to editing and enhancing the final result for professional-quality results.
Understanding Day-to-Night Time-Lapse: Day-to-night time-lapse videos are created by capturing a sequence of images or video frames at regular intervals over an extended period, typically from sunrise to sunset or vice versa. These individual frames are then stitched together and sped up to create a time-lapse video that compresses hours or even days of footage into a few seconds or minutes. Day-to-night time-lapse videos showcase the gradual changes in light, color, and atmosphere as the scene transitions from day to night or night to day, creating a mesmerizing visual narrative that captures the essence of time and motion. With Adobe Premiere Pro, users can easily edit and enhance day-to-night time-lapse footage to create cinematic and immersive videos that captivate and engage viewers.
Step 1: Capturing Time-Lapse Footage The first step in creating a day-to-night time-lapse video is to capture the time-lapse footage using a camera or smartphone equipped with a time-lapse feature or intervalometer. Choose a scene with a clear and unobstructed view of the sky and set up your camera on a stable tripod to prevent camera shake and ensure consistent framing. Determine the interval at which you want to capture each frame, such as one frame every few seconds or minutes, and set the camera to record the time-lapse sequence. Keep the camera running for several hours to capture the entire day-to-night transition, adjusting exposure settings as needed to maintain consistent exposure throughout the sequence.
Step 2: Importing Footage into Adobe Premiere Pro Once you’ve captured the time-lapse footage, transfer the files to your computer and launch Adobe Premiere Pro to begin the editing process. Create a new project in Adobe Premiere Pro and import the time-lapse footage into the project by clicking on the File menu and selecting Import, then navigating to the location of the footage on your computer. Alternatively, you can drag and drop the footage directly into the Project panel in Adobe Premiere Pro. Organize the footage in the Project panel for easy access during the editing process.
Step 3: Assembling the Time-Lapse Sequence With the time-lapse footage imported into Adobe Premiere Pro, it’s time to assemble the individual frames into a cohesive time-lapse sequence. Drag and drop the time-lapse footage from the Project panel onto the timeline to create a sequence. Adjust the duration of the footage on the timeline to control the speed of the time-lapse sequence, speeding up or slowing down the footage as desired to achieve the desired effect. Use the playback controls in Adobe Premiere Pro to preview the time-lapse sequence and ensure that it flows smoothly and transitions seamlessly from day to night.
Step 4: Color Grading and Correction After assembling the time-lapse sequence, it’s time to color grade and correct the footage to enhance its visual impact and realism. Navigate to the Color workspace in Adobe Premiere Pro by clicking on the Color tab in the top menu bar. Use the Lumetri Color panel to adjust the exposure, contrast, saturation, and white balance of the footage to achieve a balanced and cohesive look. Experiment with different color grading techniques, such as adding warmth to daytime scenes and coolness to nighttime scenes, to enhance the mood and atmosphere of the time-lapse sequence.
Step 5: Adding Additional Visual Effects (Optional) For added visual interest and impact, consider adding additional visual effects to the time-lapse sequence in Adobe Premiere Pro. Experiment with effects such as motion blur, lens flares, light leaks, and transitions to enhance the dynamic and cinematic quality of the footage. Use blending modes, opacity adjustments, and masking techniques to composite the effects with the time-lapse sequence and create more immersive and engaging visuals.
Step 6: Previewing and Fine-Tuning the Final Result Once you’ve color graded and corrected the time-lapse footage and added any additional visual effects, preview the final result in Adobe Premiere Pro to assess the overall look and feel. Use the playback controls to scrub through the timeline and review the time-lapse sequence in real-time. Pay attention to the transitions between day and night and the overall pacing and rhythm of the sequence. Make any necessary adjustments or refinements to the color grading, visual effects, and timing based on your preferences and the specific requirements of your project.
Step 7: Exporting the Final Video After fine-tuning the time-lapse sequence, it’s time to export the final video from Adobe Premiere Pro. Navigate to the Export tab in Adobe Premiere Pro and configure the export settings, such as resolution, format, and output destination. Choose a high-quality video codec and compression settings to ensure optimal playback quality and file size. Click on the Export button to render the time-lapse sequence and generate the final video with the day-to-night transition effect applied.
Tips and Best Practices:
- Choose a scene with a clear and unobstructed view of the sky and interesting foreground elements to capture compelling day-to-night time-lapse footage.
- Use a sturdy tripod and stable camera setup to prevent camera shake and ensure consistent framing throughout the time-lapse sequence.
- Experiment with different interval settings and exposure techniques to capture the nuances of the day-to-night transition and achieve the desired visual effect.
- Pay attention to the quality of light and color temperature during different times of the day to create a cohesive and immersive day-to-night transition in the time-lapse sequence.
- Consider adding motion control techniques, such as panning or tilting the camera, to create dynamic and cinematic movement in the time-lapse footage.
Conclusion: Creating a day-to-night time-lapse video in Adobe Premiere Pro is a creative and rewarding process that allows you to capture the beauty and drama of the natural world in a condensed and dynamic format. By following the step-by-step process outlined in this guide and experimenting with different techniques and settings, you can create stunning day-to-night time-lapse videos that captivate and engage viewers. Whether you’re documenting the changing seasons, showcasing urban landscapes, or capturing celestial events, Adobe Premiere Pro offers powerful tools and features for creating cinematic and immersive time-lapse sequences that elevate the quality and impact of your video projects. With practice, experimentation, and creativity, you can master the art of creating day-to-night time-lapse videos in Adobe Premiere Pro and unlock endless possibilities for visual storytelling and expression.


