Mastering the Art of Ellipse Creation in AutoCAD: A Comprehensive Guide
AutoCAD, the industry-standard computer-aided design (CAD) software developed by Autodesk, empowers architects, engineers, and designers to create precise and intricate drawings with ease. Among its vast array of tools and commands, the ability to create ellipses stands as a fundamental feature for generating curved geometries and shapes. In this comprehensive guide, we delve deep into the intricacies of creating ellipses in AutoCAD, exploring various methods, techniques, and best practices to achieve geometric perfection.
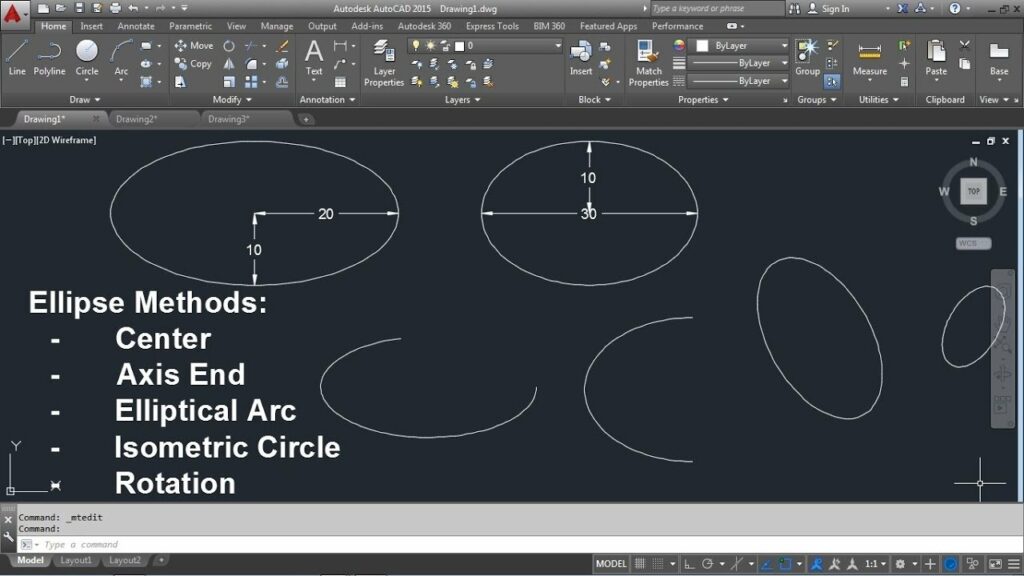
Understanding Ellipses in AutoCAD:
An ellipse is a curved geometric shape defined by its two axes: the major axis and the minor axis. In AutoCAD, ellipses can be drawn using specific commands and tools, allowing users to define the position, size, and orientation of the ellipse with precision.
Creating Ellipses:
AutoCAD provides several methods for creating ellipses, each tailored to suit different design requirements and preferences:
1. ELLIPSE Command:
The primary method for creating ellipses in AutoCAD is the ELLIPSE command. Its syntax is straightforward:
Copy code
ELLIPSE
Upon invocation, AutoCAD prompts the user to specify the center point of the ellipse and subsequently requests input for the following parameters:
- Axis Lengths: Define the major and minor axes lengths of the ellipse.
- Axis Orientation: Specify the rotation angle or the endpoint of the major axis.
By inputting these parameters, users can create ellipses of varying sizes, shapes, and orientations with precision.
2. Ellipse Tool:
Alternatively, users can utilize the Ellipse tool located in the Draw panel of the Ribbon interface. This tool provides a graphical interface for specifying the center point, major axis length, and minor axis length of the ellipse, simplifying the creation process for users who prefer visual interaction.
Key Features and Options:
The ELLIPSE command in AutoCAD offers various options and modifiers to enhance flexibility and streamline the ellipse creation process:
- Ellipse Types: AutoCAD supports three types of ellipses: Axis-End, Axis-Length, and Rotation. Users can choose the appropriate ellipse type based on the available input parameters and design requirements.
- Precise Input: Users can input precise dimensions for the major and minor axes lengths, ensuring geometric accuracy in the ellipse’s shape and size.
- Ortho Mode: Enabling Ortho mode restricts drawing movements to horizontal and vertical directions, facilitating the creation of ellipses aligned with specific axes.
- Object Snaps: Leveraging AutoCAD’s object snaps, users can snap to existing geometry points, such as endpoints, midpoints, or intersections, ensuring precise alignment and dimensioning of the ellipse.
Advanced Techniques:
Beyond basic ellipse creation, AutoCAD supports several advanced techniques for manipulating and refining ellipse geometry:
- Ellipse Editing: After creating an ellipse, users can edit its parameters, including the major and minor axes lengths and rotation angle, using AutoCAD’s editing tools.
- Ellipse Properties: AutoCAD allows users to modify ellipse properties, such as line type, color, and lineweight, to enhance visibility and distinguish ellipses from other drawing elements.
- Ellipse Arrays: Utilizing AutoCAD’s array functionality, users can create arrays of ellipses, either in a linear or polar pattern, with customizable spacing and orientation.
- Customization: AutoCAD offers extensive customization options for ellipses, allowing users to define custom ellipse styles, including line types, colors, and hatch patterns, to suit specific design preferences and standards.
Best Practices:
To achieve optimal results when creating ellipses in AutoCAD, it’s essential to adhere to the following best practices:
- Plan and Sketch: Before drawing, carefully plan the position, size, and orientation of the ellipse, sketching rough outlines if necessary to visualize the final design.
- Use Object Snaps: Always utilize object snaps to ensure precise alignment and dimensioning of the ellipse relative to existing geometry within the drawing.
- Leverage Precise Input: Take advantage of AutoCAD’s precise input options to input dimensions and angles directly, ensuring geometric accuracy and consistency in the ellipse’s shape and size.
- Practice Editing Techniques: Familiarize yourself with AutoCAD’s editing tools to efficiently modify ellipse parameters, such as axes lengths and rotation angles, without invoking separate commands.
- Stay Organized: Maintain a structured layering system and naming conventions for ellipses and other drawn elements, enhancing clarity and ease of editing within the drawing.
Conclusion:
In conclusion, creating ellipses in AutoCAD is a fundamental skill for architects, engineers, and designers seeking to produce precise and intricate drawings. By mastering the ELLIPSE command and adhering to best practices, users can effortlessly create ellipses of varying sizes, shapes, and orientations with geometric accuracy and efficiency. With AutoCAD as a powerful tool, designers can unleash their creativity and bring their visions to life through beautifully crafted ellipses and curved geometries in their drawings.


