Mastering Background Removal with the Background Eraser Tool in Photoshop: A Comprehensive Guide
In the ever-evolving realm of digital design and photo manipulation, the quest for seamless background removal is a common pursuit. Adobe Photoshop, a stalwart in the creative toolbox, offers an array of tools for this purpose, and among them, the Background Eraser Tool stands out as a powerful and versatile instrument. This comprehensive guide delves into the intricacies of the Background Eraser Tool, exploring its functionalities, best practices, and advanced techniques for achieving pixel-perfect background removals with precision and finesse.
I. Unveiling the Background Eraser Tool: An Overview
1. Introduction to the Background Eraser Tool:
- The Background Eraser Tool in Photoshop is specifically designed to remove backgrounds from images seamlessly. It operates based on sampling the colors of the pixels under the cursor and erasing similarly colored areas, making it a valuable asset for isolating subjects and creating captivating compositions.
2. Locating the Background Eraser Tool:
- To access the Background Eraser Tool, navigate to the toolbar on the left side of the Photoshop workspace. It shares a position with the regular Eraser Tool, so be sure to select the Background Eraser from the dropdown menu.
3. Configuring Tool Options:
- The Background Eraser Tool comes with a range of customizable options. Users can adjust brush size, hardness, and tolerance settings to cater to the specific requirements of the image being edited. These settings play a crucial role in determining the tool’s behavior.
II. Understanding Tolerance and Sampling
1. Tolerance: The Key to Seamless Removals:
- Tolerance, a pivotal setting in the Background Eraser Tool, controls the range of colors that the tool considers similar. A higher tolerance includes a broader spectrum of colors, while a lower tolerance narrows down the selection to closely matching hues.
2. Sampling Modes: Fine-Tuning Color Detection:
- The Background Eraser Tool offers three sampling modes: Continuous, Once, and Background Swatch. Each mode influences how the tool samples colors, providing flexibility in refining the precision of background removal based on the image’s complexity.
3. Protect Foreground Colors: Preserving Subjects:
- The “Protect Foreground Color” option in the tool settings allows users to safeguard specific foreground colors from being erased. This feature is particularly useful when removing backgrounds around intricate subjects, ensuring their preservation.
III. Best Practices for Efficient Background Removal
1. Zooming In for Detail: Precision at Every Pixel:
- To achieve meticulous results, zoom in on the image while using the Background Eraser Tool. This allows for a closer inspection of the areas being edited, ensuring that no details are inadvertently erased.
2. Adjusting Brush Hardness: Soft Edges for Smooth Blending:
- Depending on the complexity of the image, adjusting the brush hardness can enhance blending. A softer brush edge creates smoother transitions, minimizing the visibility of erased edges for a more natural look.
3. Iterative Editing: Gradual Refinement for Perfection:
- Approach background removal iteratively, refining settings and making multiple passes with the Background Eraser Tool. This method allows for gradual refinement, ensuring that each adjustment contributes to the overall precision of the edit.
IV. Advanced Techniques for Background Eraser Mastery
1. Overlaying Solid Color Backgrounds: Checking Edges:
- After removing the background, overlay a solid color as the new background. This aids in scrutinizing the edges for any remnants of the previous background. Adjustments can be made to achieve a seamless blend between the subject and the new backdrop.
2. Combining with Layer Masks: Precision Control:
- For enhanced control and non-destructive editing, combine the Background Eraser Tool with Layer Masks. This allows users to fine-tune the removal by painting on the mask, reinstating or concealing areas as needed.
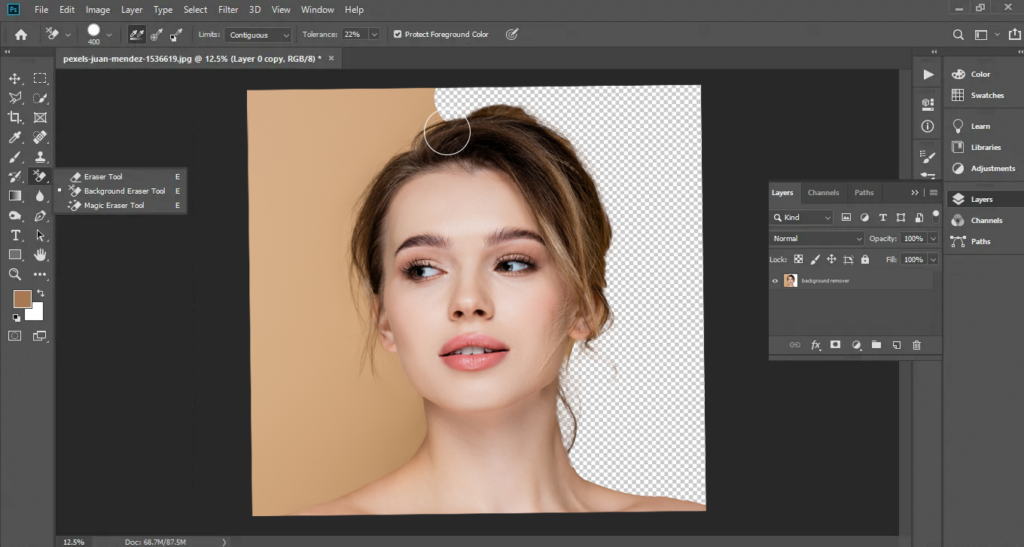
3. Refining Hair and Detailed Elements: Special Considerations:
- Background removal around intricate elements like hair requires special attention. Utilize a smaller brush size, lower tolerance, and experiment with the Protect Foreground Color option to meticulously preserve fine details.
V. Troubleshooting Common Challenges
1. Dealing with Color Bleeding: Tolerance Adjustments:
- Color bleeding, where erasing spills into the subject, can be mitigated by fine-tuning the tolerance settings. Lowering the tolerance helps contain the erasing action to a narrower range of colors.
2. Handling Complex Backgrounds: Iterative Approach:
- Complex backgrounds may pose challenges during removal. Adopt an iterative approach, adjusting settings and making gradual passes with the Background Eraser Tool to achieve optimal results.
3. Blending with Soft Brushes: Seamless Integration:
- If visible edges persist after background removal, use soft brushes to manually blend the subject with the new background. This post-processing step ensures a harmonious integration of the subject into its surroundings.
VI. Optimizing Output: File Formats and Saving Options
1. Choosing Output File Formats: Maintaining Quality:
- When saving images after background removal, consider the intended use. For web graphics, JPEG is suitable, while PNG preserves transparency. For high-quality editing, TIFF or PSD formats maintain pixel data without compression.
2. Saving with Transparency: Preserving Edges:
- When preserving transparency for later use, save the image in a format that supports it, such as PNG. This ensures that the edited image can be seamlessly integrated into various design projects without a predefined background.
3. Exporting for Different Mediums: Tailoring Specifications:
- Consider the specifications required for different mediums. Web graphics may have different requirements than print materials, so tailor the output settings accordingly to maintain optimal quality.
VII. Future Perspectives: Advancements in Background Removal
1. AI-Powered Background Removal: Streamlining Workflows:
- The future of background removal in Photoshop may witness the integration of artificial intelligence (AI) for enhanced efficiency and precision. AI-powered tools could automate complex selections, making the process more accessible for users.
2. Real-Time Background Editing: Interactive Creativity:
- As technology advances, real-time background editing features may become more prevalent. This could allow users to see immediate results as they adjust settings, providing a more interactive and intuitive editing experience.
3. Enhanced User Guidance: Intuitive Editing Tools:
- Future iterations of the Background Eraser Tool may incorporate enhanced user guidance features. This could include real-time previews, tooltips, and contextual help, making the tool more user-friendly for both beginners and experienced designers.
VIII. Conclusion: Crafting Flawless Compositions with Precision
In conclusion, mastering the Background Eraser Tool in Photoshop is akin to wielding a digital scalpel for meticulous background removal surgeries. From understanding the tool’s intricacies to implementing advanced techniques, this comprehensive guide equips users with the knowledge needed to achieve pixel-perfect results. Whether you’re a seasoned designer, a photographer refining product images, or an enthusiast exploring the possibilities of digital editing, the Background Eraser Tool stands as a versatile ally in the pursuit of crafting flawless compositions with precision and finesse. As you embark on your background removal endeavors, may your subjects seamlessly emerge from the digital canvas, free from the constraints of their original backgrounds, ready to captivate and harmonize within new visual narratives.


