How to Set Up Bank Feeds in QuickBooks: A Comprehensive Guide
Setting up bank feeds in QuickBooks can significantly streamline your bookkeeping process, allowing you to automatically import and categorize transactions from your bank directly into QuickBooks. This not only saves time but also reduces the risk of errors, ensuring that your financial records are accurate and up-to-date. This comprehensive guide will walk you through the process of setting up bank feeds in QuickBooks, including initial setup, troubleshooting common issues, and best practices for managing your bank feeds.
Why Set Up Bank Feeds in QuickBooks?
Integrating your bank account with QuickBooks via bank feeds offers several advantages:
- Efficiency: Automating the import of bank transactions saves time and reduces manual data entry.
- Accuracy: Direct bank feeds minimize errors that can occur with manual entry.
- Real-Time Data: Bank feeds provide up-to-date financial information, helping you make informed business decisions.
- Reconciliation: Simplified bank reconciliation process as transactions are automatically matched with your QuickBooks entries.
- Cash Flow Management: Improved cash flow management with real-time access to transaction data.
Preparing to Set Up Bank Feeds
Before setting up bank feeds in QuickBooks, you need to prepare some essential information and ensure that your QuickBooks version supports this feature.
Check QuickBooks Version
Ensure that you are using a version of QuickBooks that supports bank feeds. QuickBooks Online and QuickBooks Desktop (Pro, Premier, and Enterprise) all support bank feeds.
Gather Bank Account Information
You will need the following information from your bank:
- Bank name
- Online banking login credentials (username and password)
- Bank account number
- Routing number (for some banks)
Ensure Internet Connection
A stable internet connection is required to set up and maintain bank feeds.
Setting Up Bank Feeds in QuickBooks Online
QuickBooks Online makes it easy to connect your bank account and start importing transactions.
Step 1: Connect Your Bank Account
- Open QuickBooks Online: Log in to your QuickBooks Online account.
- Navigate to Banking: Go to the left-hand navigation menu and select “Banking.”
- Add Account: Click on “Add account” or “Link account” if this is your first time setting up a bank feed.
- Search for Your Bank: In the search bar, type the name of your bank and select it from the list.
- Enter Login Credentials: Enter your online banking username and password. Follow the prompts to authorize QuickBooks to access your account.
- Choose Accounts to Connect: Select the specific bank accounts you want to connect to QuickBooks. You can connect multiple accounts if needed.
- Import Transactions: QuickBooks will automatically import transactions from the past 90 days. You can adjust the date range if necessary.
- Finish Setup: Click “Connect” to complete the setup. QuickBooks will begin importing your bank transactions.
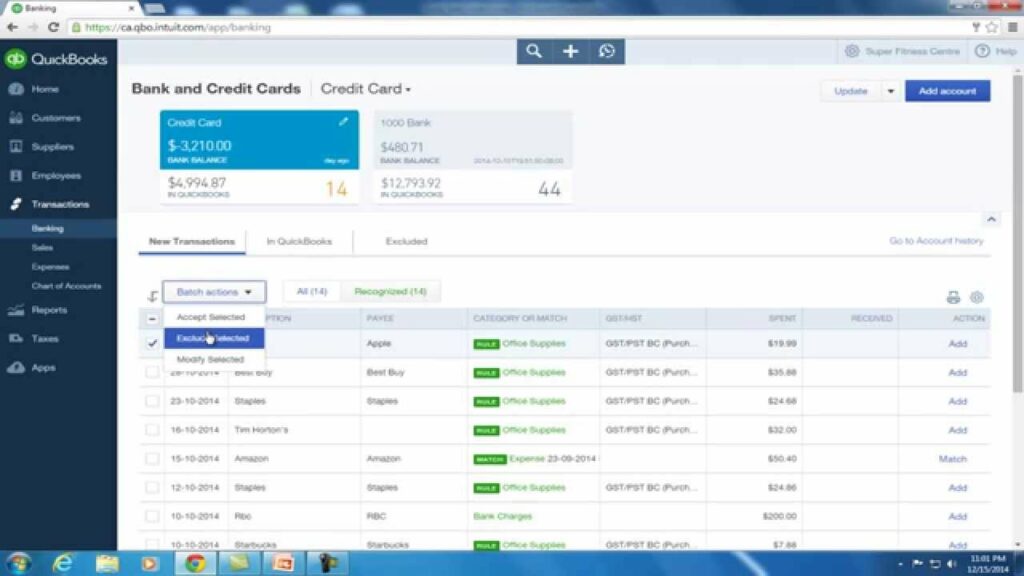
Step 2: Categorize Transactions
- Review Transactions: Go to the “Banking” menu and review the imported transactions.
- Categorize Transactions: For each transaction, select the appropriate category (e.g., expenses, income, etc.). You can create rules to automatically categorize similar transactions in the future.
- Match Transactions: QuickBooks will try to match imported transactions with existing QuickBooks entries. Review and approve these matches to ensure accuracy.
- Add Unmatched Transactions: For transactions that don’t match existing entries, you can add them as new transactions in QuickBooks.
Setting Up Bank Feeds in QuickBooks Desktop
QuickBooks Desktop users can also set up bank feeds to import and manage transactions efficiently.
Step 1: Connect Your Bank Account
- Open QuickBooks Desktop: Launch QuickBooks Desktop and open your company file.
- Navigate to Bank Feeds: Go to the “Banking” menu and select “Bank Feeds,” then “Set Up Bank Feeds for an Account.”
- Find Your Bank: In the Bank Feeds Setup window, search for your bank and select it from the list.
- Enter Login Credentials: Enter your online banking username and password. Follow the prompts to authorize QuickBooks to access your account.
- Select Accounts to Connect: Choose the bank accounts you want to connect. You can connect multiple accounts if needed.
- Complete Setup: Follow the remaining prompts to complete the setup. QuickBooks will begin importing your bank transactions.
Step 2: Import and Categorize Transactions
- Download Transactions: Go to the “Banking” menu, select “Bank Feeds,” and then “Bank Feeds Center.” Click “Download Transactions” to import new transactions.
- Review Transactions: In the Bank Feeds Center, review the imported transactions.
- Match Transactions: QuickBooks will try to match imported transactions with existing QuickBooks entries. Review and approve these matches.
- Add Unmatched Transactions: For transactions that don’t match existing entries, you can add them as new transactions in QuickBooks.
- Categorize Transactions: Categorize each transaction by selecting the appropriate category.
Troubleshooting Common Bank Feed Issues
Despite the convenience of bank feeds, you may encounter some common issues. Here are solutions to the most frequent problems:
Connection Issues
- Error Messages: If you receive an error message when connecting your bank, check your internet connection and ensure you are using the correct login credentials.
- Bank Not Listed: If your bank is not listed in QuickBooks, you may need to manually import transactions using a .QBO file from your bank.
Duplicate Transactions
- Duplicate Entries: If you notice duplicate transactions, ensure you haven’t manually entered the same transactions that were imported via bank feeds. Use the “Match” feature to reconcile duplicates.
Missing Transactions
- Incomplete Imports: If transactions are missing, check the date range settings to ensure you are importing all relevant transactions. You can manually adjust the date range if needed.
- Manual Upload: For missing transactions, you can download a .QBO file from your bank and manually upload it to QuickBooks.
Incorrect Categorization
- Review Rules: If transactions are being incorrectly categorized, review your categorization rules and adjust them as needed.
- Manual Override: Manually re-categorize any incorrectly categorized transactions to ensure accuracy.
Best Practices for Managing Bank Feeds
To get the most out of bank feeds in QuickBooks, follow these best practices:
Regular Review
- Daily Checks: Regularly check your bank feeds to ensure all transactions are imported and categorized correctly.
- Reconciliation: Reconcile your bank accounts monthly to catch any discrepancies early.
Accurate Categorization
- Set Up Rules: Use categorization rules to automate the process and reduce manual work. Regularly review these rules to ensure they remain accurate.
- Manual Review: Periodically review transactions to ensure they are categorized correctly and adjust as necessary.
Secure Access
- Protect Credentials: Keep your banking login credentials secure and do not share them with unauthorized individuals.
- Regular Updates: Regularly update your QuickBooks and bank software to ensure compatibility and security.
Backup Data
- Regular Backups: Regularly back up your QuickBooks data to prevent data loss and ensure you can recover information if needed.
- Cloud Storage: Consider using cloud storage for additional security and ease of access.
Advanced Tips for Using Bank Feeds
For more advanced use of bank feeds, consider these additional tips:
Automate Reconciliation
- Reconciliation Automation: Use QuickBooks’ automatic reconciliation feature to match transactions and reconcile your accounts automatically.
- Manual Adjustments: Make manual adjustments as needed to ensure all transactions are correctly matched.
Use Third-Party Apps
- Integration: Integrate third-party apps with QuickBooks to enhance your bank feed functionality, such as expense tracking or advanced reporting tools.
- App Marketplace: Explore the QuickBooks App Marketplace to find compatible apps that can streamline your financial management.
Monitor Cash Flow
- Cash Flow Forecasting: Use the real-time data from your bank feeds to forecast your cash flow and make informed financial decisions.
- Budgeting: Implement budgeting tools within QuickBooks to manage your expenses and stay on track financially.
Conclusion
Setting up and managing bank feeds in QuickBooks can revolutionize the way you handle your business’s financial transactions. By automating the import and categorization of transactions, you save time, reduce errors, and gain real-time insights into your financial health. Follow the steps and best practices outlined in this guide to ensure a smooth and efficient bank feed setup. Regularly review and reconcile your transactions, protect your financial data, and leverage advanced features to make the most of QuickBooks’ powerful capabilities. With proper management, bank feeds can be a valuable tool in maintaining accurate and up-to-date financial records, helping you make informed decisions and ensure the financial stability of your business.


