How to Replace a Laptop Battery: A Comprehensive Guide
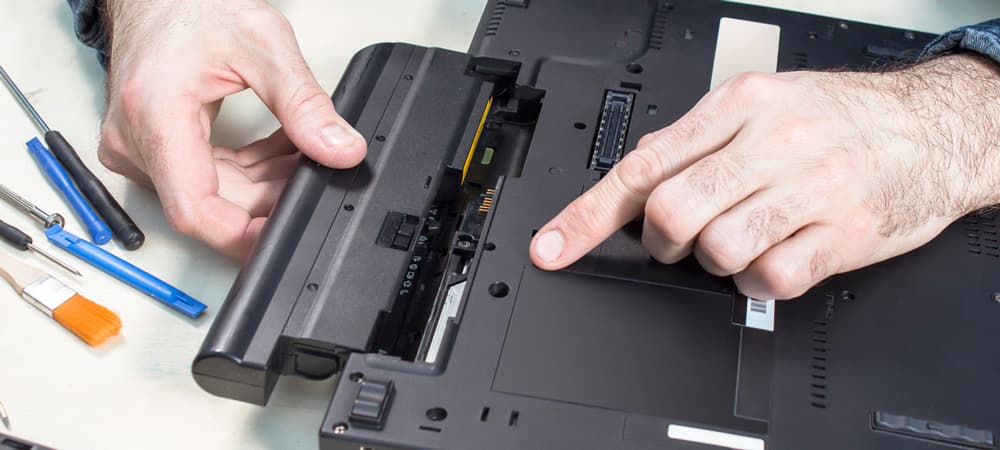
Laptop service. Removal of the battery by a service technician. Tools lie on the table next to it.
Laptop batteries degrade over time, leading to reduced battery life and performance. Replacing a laptop battery can breathe new life into your device, extending its usability and portability. This comprehensive guide will walk you through the process of replacing a laptop battery, covering everything from preparation and tools needed to detailed step-by-step instructions for various laptop models.
Understanding Laptop Batteries
Types of Laptop Batteries
- Lithium-Ion (Li-ion) Batteries: Common in most modern laptops, these batteries are lightweight, have a high energy density, and no memory effect.
- Nickel-Cadmium (NiCd) Batteries: Older technology, heavier, and prone to memory effect.
- Nickel-Metal Hydride (NiMH) Batteries: Similar to NiCd but with higher capacity and less prone to memory effect.
Signs Your Laptop Battery Needs Replacement
- Reduced Battery Life: The laptop does not hold a charge as long as it used to.
- Unexpected Shutdowns: The laptop shuts down abruptly even with remaining battery percentage.
- Battery Not Charging: The battery does not charge or charges very slowly.
- Overheating: The battery gets excessively hot during use or charging.
- Battery Swelling: The battery appears swollen or deformed.
Preparing for Battery Replacement
Check Your Warranty
Before replacing the battery, check if your laptop is still under warranty. Some manufacturers may void the warranty if you replace the battery yourself.
Identify Your Laptop Model and Battery Type
- Laptop Model: Locate the model number on the bottom of your laptop or in the system settings.
- Battery Type: Refer to the user manual or manufacturer’s website to identify the correct battery type.
Purchase the Correct Battery
- Manufacturer’s Website: Buy directly from the manufacturer for guaranteed compatibility.
- Reputable Retailers: Purchase from reputable online or brick-and-mortar stores.
- Third-Party Batteries: Ensure they are certified and compatible with your laptop model.
Gather Necessary Tools
- Screwdrivers: Phillips and flathead screwdrivers of various sizes.
- Plastic Pry Tools: To safely open the laptop casing without damaging it.
- Anti-Static Wrist Strap: To prevent static electricity from damaging internal components.
- Replacement Battery: Ensure it is compatible with your laptop model.
Step-by-Step Guide to Replacing a Laptop Battery
General Precautions
- Power Off: Turn off your laptop and unplug it from any power source.
- Remove External Devices: Disconnect all peripherals and external devices.
- Ground Yourself: Use an anti-static wrist strap or touch a grounded metal object to discharge any static electricity.
Replacing an External Laptop Battery
Many laptops have batteries that are accessible from the outside, making replacement straightforward.
Step 1: Locate the Battery
- Turn the Laptop Over: Place the laptop on a soft surface with the bottom facing up.
- Identify the Battery Compartment: Look for a battery release latch or screws holding the battery in place.
Step 2: Remove the Battery
- Unlock the Latch: Slide the battery release latch to unlock the battery.
- Remove the Battery: Gently lift and remove the battery from the compartment.
Step 3: Insert the New Battery
- Align the Battery: Align the new battery with the compartment.
- Secure the Battery: Press the battery into place until it clicks, or secure it with screws if applicable.
Step 4: Power On and Test
- Reconnect Power Adapter: Plug in the power adapter.
- Power On: Turn on the laptop and ensure the new battery is recognized and charging.
Replacing an Internal Laptop Battery
Some laptops have batteries located inside the casing, requiring disassembly to replace.
Step 1: Open the Laptop Case
- Remove Screws: Use the appropriate screwdriver to remove the screws securing the bottom case.
- Pry Open the Case: Use a plastic pry tool to carefully separate the bottom case from the laptop.
Step 2: Locate the Battery
- Identify the Battery: Locate the battery, which is usually a flat, rectangular component connected to the motherboard.
Step 3: Disconnect the Battery
- Unplug Battery Connector: Gently disconnect the battery connector from the motherboard.
Step 4: Remove the Battery
- Unscrew the Battery: Remove any screws securing the battery to the laptop.
- Lift and Remove: Carefully lift and remove the old battery.
Step 5: Install the New Battery
- Position the Battery: Place the new battery in the same position as the old one.
- Secure the Battery: Screw the battery into place if necessary.
- Reconnect the Battery: Plug the battery connector into the motherboard.
Step 6: Reassemble the Laptop
- Reattach the Bottom Case: Align the bottom case and press it back into place.
- Secure the Screws: Reinsert and tighten the screws.
Step 7: Power On and Test
- Reconnect Power Adapter: Plug in the power adapter.
- Power On: Turn on the laptop and ensure the new battery is recognized and charging.
Post-Replacement Steps
Battery Calibration
Calibrating the new battery ensures accurate battery level readings.
- Charge Fully: Charge the battery to 100%.
- Discharge Completely: Use the laptop until it shuts down due to low battery.
- Recharge Fully: Charge the battery back to 100% without interruption.
Monitor Battery Health
Use built-in tools or third-party software to monitor the health and performance of the new battery.
- Windows: Use
Battery Report(typepowercfg /batteryreportin Command Prompt). - macOS: Use
System Information(holdOptionkey and clickApple Menu>System Information>Power). - Linux: Use tools like
UpowerorTLP.
Dispose of Old Battery Properly
Recycle the old battery according to local regulations to prevent environmental harm.
Troubleshooting Common Issues
Battery Not Recognized
- Check Connections: Ensure the battery is properly connected.
- Update BIOS/Firmware: Install the latest BIOS or firmware updates.
- Reset SMC (macOS): Reset the System Management Controller.
Battery Not Charging
- Check Power Adapter: Ensure the power adapter is functioning correctly.
- Inspect Charging Port: Check for debris or damage in the charging port.
- Update Drivers: Update battery and power management drivers.
Short Battery Life
- Power Settings: Adjust power settings for better battery performance.
- Background Processes: Close unnecessary background processes and applications.
- Battery Calibration: Calibrate the battery if not done initially.
Tips for Prolonging Battery Life
Optimal Charging
- Avoid Overcharging: Unplug the laptop once it reaches 100%.
- Partial Charges: Charge to 80-90% and discharge to 20-30% for longevity.
Temperature Management
- Avoid Extreme Temperatures: Keep the laptop in a cool, dry place.
- Use Cooling Pads: Use cooling pads to prevent overheating.
Reduce Power Consumption
- Lower Screen Brightness: Reduce screen brightness to save battery.
- Disable Unnecessary Features: Turn off Bluetooth, Wi-Fi, and other features when not in use.
Regular Maintenance
- Clean Vents and Fans: Ensure proper airflow to prevent overheating.
- Update Software: Keep the operating system and applications updated.
Conclusion
Replacing a laptop battery is a straightforward process that can significantly extend the life and performance of your device. By following the detailed steps and best practices outlined in this comprehensive guide, you can confidently replace your laptop battery and maintain its health over time. Remember to take necessary precautions, use the right tools, and properly dispose of the old battery to ensure a safe and successful replacement. With proper care and maintenance, your new battery will provide reliable power for your laptop for years to come.


