How to install case fans
Introduction to Installing Case Fans
Case fans play a crucial role in cooling your computer components by circulating air through the case and exhausting hot air. Installing case fans correctly involves selecting the right fans, determining placement for optimal airflow, and connecting them to your motherboard or power supply unit (PSU).
Preparation
Before you start installing case fans, gather the necessary tools and information:
- Tools Needed:
- Screwdriver (typically Phillips-head or sometimes a hex key, depending on fan screws)
- Thermal paste (if installing CPU cooler fans)
- Cable ties or Velcro straps for cable management
- Case and Fan Compatibility:
- Check your computer case specifications to determine the supported sizes and locations for case fans (typically 120mm or 140mm).
- Verify fan compatibility with your motherboard headers or PSU connectors (3-pin or 4-pin).
- Safety Precautions:
- Power off your computer and unplug it from the power source before installing or handling any internal components.
- Ground yourself by wearing an anti-static wrist strap or touching a metal part of the case to prevent static discharge.
Step-by-Step Guide to Install Case Fans
Step 1: Choose Fan Placement
- Determine Airflow Direction:
- Decide whether each fan will intake cool air into the case or exhaust hot air out of the case. Typically, front and bottom fans intake air, while rear and top fans exhaust air.
- Consider Positive vs. Negative Pressure:
- Positive pressure (more intake fans than exhaust) reduces dust buildup inside the case. Negative pressure (more exhaust fans than intake) can provide better cooling efficiency but may draw in more dust.
Step 2: Prepare the Case
- Open the Case:
- Use a screwdriver to remove the side panels of your computer case. Some cases have tool-less mechanisms for easier access.
- Locate Fan Mounting Points:
- Identify the mounting points for case fans inside your computer case. These are typically marked with screw holes and located near the front, rear, top, or bottom of the case.
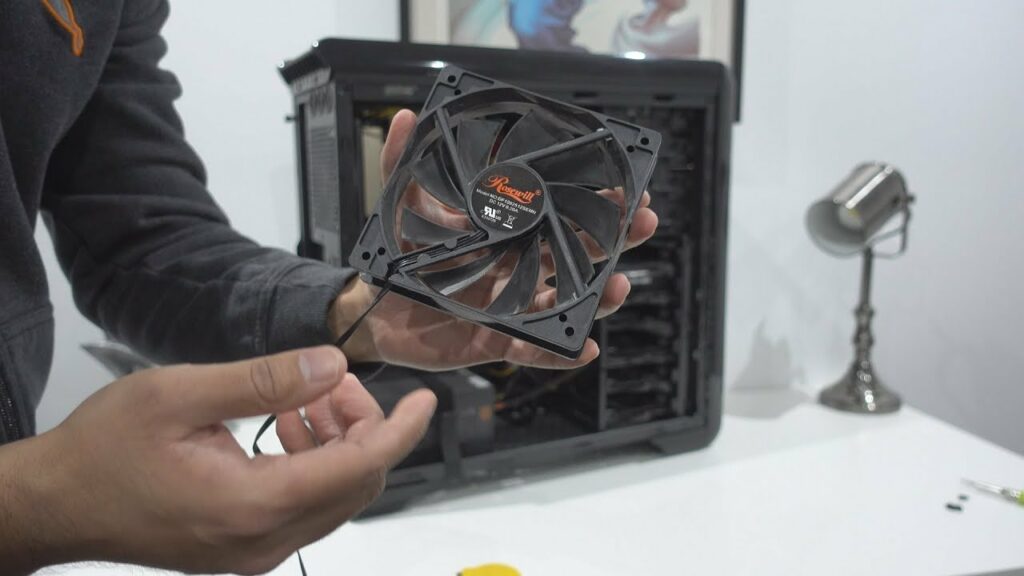
Step 3: Install Case Fans
For Installing 120mm or 140mm Case Fans:
- Position the Fan:
- Place the case fan in the desired location, aligning it with the mounting holes in the case.
- Secure the Fan:
- Use screws provided with the fan or case to secure the fan to the mounting points. Start with one screw to hold the fan in place, then align and insert remaining screws.
- Connect Fan Cables:
- Connect the fan cable to the motherboard fan header (3-pin or 4-pin) for PWM control or directly to the PSU using a molex connector for constant speed.
Step 4: Cable Management
- Route Fan Cables:
- Route fan cables neatly along designated cable management channels or tie-down points inside the case. Use cable ties or Velcro straps to secure cables and prevent them from obstructing airflow or tangling with other components.
- Connect Multiple Fans:
- If installing multiple fans, consider using a fan splitter cable to connect them to a single motherboard fan header, ensuring they operate synchronously.
Step 5: Test and Adjust
- Power On Your Computer:
- Once all case fans are installed and cables are connected, plug your computer back into the power source and power it on.
- Monitor Fan Operation:
- Access BIOS/UEFI or use software tools to monitor fan speeds and ensure they are operating correctly.
- Check airflow direction and temperatures to verify that the installed fans are effectively cooling your components.
Step 6: Maintenance and Optimization
- Regular Cleaning:
- Periodically clean dust buildup on case fan blades and inside the case using compressed air or a soft brush. This prevents airflow obstruction and maintains cooling efficiency.
- Fan Speed Adjustment:
- Use BIOS/UEFI settings or software tools to adjust fan speeds based on system temperature or user preferences. Optimize fan curves for quieter operation or maximum cooling performance as needed.
Troubleshooting
If your case fans do not operate correctly after installation, consider the following troubleshooting steps:
- Check Connections: Ensure fan cables are securely connected to the motherboard fan headers or PSU connectors.
- Verify Fan Orientation: Confirm that fans are installed in the correct orientation for airflow (intake vs. exhaust).
- Adjust Fan Speeds: Adjust fan speeds in BIOS/UEFI settings to ensure they respond appropriately to system temperatures.
Conclusion
Installing case fans is essential for maintaining optimal airflow and cooling performance in your computer system. By following this step-by-step guide and taking necessary precautions, you can effectively install case fans to improve system stability, prolong component lifespan, and enhance overall performance.
Always refer to specific instructions provided by your case and fan manufacturers for detailed guidance and recommendations specific to your hardware.


