How to Import and Edit 360-Degree Videos in PowerDirector
Editing 360-degree videos has become increasingly popular with the rise of immersive content. CyberLink PowerDirector, a robust video editing software, offers comprehensive tools and features to import, edit, and enhance 360-degree videos effectively. This guide will walk you through the process of importing and editing 360-degree videos in PowerDirector, from initial setup to advanced editing techniques.
1. Introduction to 360-Degree Videos
360-degree videos provide viewers with an immersive experience, allowing them to explore scenes from different angles. These videos capture footage in all directions simultaneously, using specialized cameras or rigs.
a. What Are 360-Degree Videos?
- Immersive Experience: Viewers can interactively navigate through the video, choosing their viewpoint.
- 360-Degree Cameras: Cameras capture footage in all directions, typically using multiple lenses or a specialized rig.
- Applications: Used for virtual tours, VR experiences, action sports, and more.
b. Benefits of Editing 360-Degree Videos
- Interactive Storytelling: Engage viewers by allowing them to control their viewing experience.
- Versatile Applications: Suitable for various industries including tourism, education, and entertainment.
- Creative Freedom: Experiment with unique editing techniques like spatial audio and VR effects.
2. Getting Started with PowerDirector and 360-Degree Videos
Before editing 360-degree videos, ensure your system meets the requirements and set up your project in PowerDirector.
a. System Requirements
- Hardware: Ensure your computer meets PowerDirector’s hardware requirements, especially for processing intensive 360-degree video footage.
- Software: Install the latest version of PowerDirector to access the latest features and optimizations for 360-degree video editing.
b. Setting Up Your Project
- Create New Project: Launch PowerDirector and create a new project.
- Project Settings: Set project settings to match the resolution and frame rate of your 360-degree video footage.
3. Importing 360-Degree Videos
PowerDirector supports various methods for importing 360-degree videos, whether from cameras or downloaded sources.
a. Direct Import from Camera
- Connect Camera: If using a 360-degree camera, connect it to your computer.
- Import Footage: PowerDirector should recognize the camera automatically. Use the import feature to transfer footage directly to your project.
b. Import from File
- Locate Footage: Navigate to where your 360-degree video files are stored on your computer.
- Drag and Drop: Drag the files into the PowerDirector media library or timeline.
c. Downloaded Footage
- Download Source: If you’ve downloaded 360-degree videos, import them into PowerDirector using the file import method.
- Library Management: Organize imported footage into folders within the PowerDirector media library for easy access.
4. Editing 360-Degree Videos in PowerDirector
Editing 360-degree videos in PowerDirector involves unique tools and techniques tailored to immersive content.
a. Understanding the Workspace
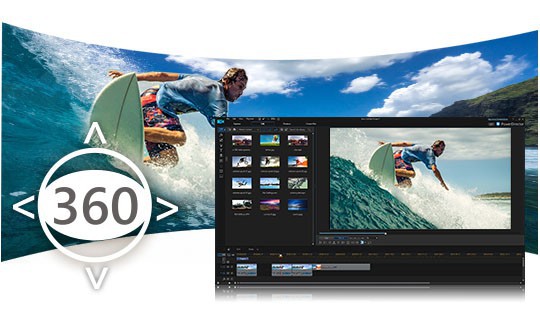
- 360-Degree View: In PowerDirector’s preview window, toggle between different views including equirectangular projection.
- 360-Degree Tools: Access specialized tools for editing and enhancing 360-degree videos in the editing workspace.
b. Basic Editing Techniques
- Trimming and Splitting: Use standard editing tools to trim and split 360-degree clips on the timeline.
- Adding Effects: Apply effects and transitions that enhance the immersive experience without distorting the video’s spherical nature.
c. Advanced Editing Techniques
- 360-Degree Effects: Utilize PowerDirector’s VR effects for immersive enhancements like adding text or graphics that respond to the viewer’s perspective.
- Spatial Audio: Integrate spatial audio to further immerse viewers by matching sound direction to the viewer’s perspective within the video.
5. Enhancing 360-Degree Videos
PowerDirector offers various enhancements to refine and polish your 360-degree video projects.
a. Color Correction and Grading
- Color Tools: Use PowerDirector’s color correction tools to adjust exposure, contrast, and color balance across the entire 360-degree video.
- 360-Degree Viewing: Preview color adjustments in different perspectives to ensure consistency across all viewing angles.
b. Adding Titles and Graphics
- Text and Titles: Overlay text and titles that are viewable from any angle within the 360-degree environment.
- Graphic Elements: Integrate logos, overlays, and visual elements that maintain their position relative to the viewer’s perspective.
c. Exporting 360-Degree Videos
- Export Settings: Configure PowerDirector’s export settings to maintain the spherical format of your 360-degree video.
- Format Options: Choose VR-friendly formats like 360-degree video for platforms that support immersive playback.
6. Practical Applications of 360-Degree Videos
360-degree videos have diverse applications across various industries, leveraging immersive technology to engage audiences.
a. Tourism and Real Estate
- Virtual Tours: Create immersive virtual tours of properties or travel destinations that allow viewers to explore freely.
- Interactive Experiences: Enhance engagement by showcasing panoramic views and detailed environments.
b. Education and Training
- Training Simulations: Develop interactive training modules that simulate real-world scenarios from multiple perspectives.
- Educational Content: Provide immersive educational experiences that deepen understanding through exploration.
c. Entertainment and Events
- Live Performances: Capture live events and performances in 360 degrees to transport viewers into the action.
- Interactive Storytelling: Produce immersive narratives where viewers control the storyline by choosing where to look.
7. Tips and Best Practices
To optimize your editing workflow and maximize the impact of your 360-degree videos, consider these tips and best practices.
a. Pre-Production Planning
- Storyboarding: Plan shots and sequences that take advantage of 360-degree immersion.
- 360-Degree Capture: Use quality 360-degree cameras and rigs for optimal footage.
b. Editing Efficiency
- Keyboard Shortcuts: Learn PowerDirector’s shortcuts to streamline editing tasks, especially for 360-degree video manipulation.
- Proxy Editing: Use proxy files to maintain editing fluidity with high-resolution 360-degree footage.
c. Quality Control
- Playback Testing: Regularly preview your 360-degree video in different VR headsets or player applications to ensure a seamless viewing experience.
- Feedback Loop: Gather feedback from viewers to refine editing techniques and improve future projects.
8. Troubleshooting Common Issues
When editing 360-degree videos in PowerDirector, you may encounter specific challenges. Here’s how to troubleshoot common issues.
a. Stitching Errors
- Check Footage: Ensure 360-degree footage is properly stitched together before importing into PowerDirector.
- Update Software: Keep PowerDirector updated to access the latest fixes and optimizations for 360-degree editing.
b. Export Settings
- Format Compatibility: Confirm that your chosen export format supports 360-degree video playback on intended platforms.
- Adjust Settings: Fine-tune export settings to balance video quality and file size without compromising immersive integrity.
c. Performance Optimization
- Hardware Acceleration: Enable hardware acceleration within PowerDirector settings for smoother editing and rendering.
- Project Organization: Keep projects organized by using folders and naming conventions to avoid workflow disruptions.
9. Exporting Your Final 360-Degree Video
Once your 360-degree video is edited and refined, it’s time to export it for distribution or playback.
a. Previewing
- Final Review: Playback the entire project within PowerDirector to confirm all edits, effects, and enhancements.
- Quality Assurance: Verify that the exported video maintains immersive quality and fidelity across viewing angles.
b. Export Process
- Export Settings: Configure PowerDirector’s export settings for 360-degree video, ensuring compatibility with VR platforms and players.
- File Naming: Use descriptive filenames and include metadata that identifies the video as 360-degree content.
Conclusion
Editing 360-degree videos in CyberLink PowerDirector opens up a world of creative possibilities, allowing you to craft immersive experiences that captivate and engage audiences. By following this comprehensive guide, you can confidently import, edit, and enhance your 360-degree video projects using PowerDirector’s specialized tools and features. Whether you’re producing virtual tours, educational content, or immersive storytelling, PowerDirector empowers you to unleash your creativity and deliver impactful 360-degree videos. Experiment with different techniques, embrace new storytelling methods, and push the boundaries of immersive video editing with PowerDirector. Happy editing!


