How to attach storage drives
Introduction to Attaching Storage Drives
Storage drives are essential components that provide long-term data storage for your computer. SSDs offer faster read/write speeds and durability, while HDDs provide larger capacities at a lower cost per gigabyte. Attaching these drives involves physically installing them in the appropriate drive bays or mounting locations within your computer case and connecting them to the motherboard and power supply.
Preparation
Before you start attaching storage drives, gather the necessary tools and components:
- Tools Needed:
- Screwdriver (typically Phillips-head for securing drives)
- SATA cables (usually included with the motherboard or storage drive)
- Power cables (from the power supply unit)
- Mounting screws (often included with the computer case or storage drive)
- Components Needed:
- SSD or HDD (depending on your storage needs)
- Computer case with drive bays or mounting points
- Motherboard with SATA ports
- Power supply unit (PSU) with SATA power connectors
- Safety Precautions:
- Power off your computer and unplug it from the power source before installing or handling any internal components.
- Ground yourself by touching a metal part of the case to discharge static electricity and prevent damage to sensitive electronics.
Step-by-Step Guide to Attach Storage Drives
Step 1: Prepare the Computer Case
- Open the Case:
- Use a screwdriver to remove the side panels of your computer case. Some cases have tool-less mechanisms for easier access to drive bays.
- Locate Drive Bays or Mounting Points:
- Identify the drive bays or mounting points inside the case where you will install the storage drives. Most cases have dedicated 2.5-inch or 3.5-inch drive bays or brackets.
Step 2: Prepare the Storage Drive
- Choose the Installation Location:
- Determine whether you will install the storage drive in a 2.5-inch or 3.5-inch drive bay, or if it will be mounted elsewhere in the case using brackets or adapters.
- Attach Mounting Screws (if necessary):
- If installing a 3.5-inch HDD or a 2.5-inch SSD in a 3.5-inch bay, use the provided mounting screws to secure the drive to the bay or bracket. Align the screw holes on the drive with those on the bay or bracket, then tighten the screws using a screwdriver.
Step 3: Connect SATA and Power Cables
- Locate SATA Ports on the Motherboard:
- Identify the SATA ports on the motherboard labeled for storage drives. These are usually located near the edge of the motherboard and are often color-coded (e.g., SATA1, SATA2).
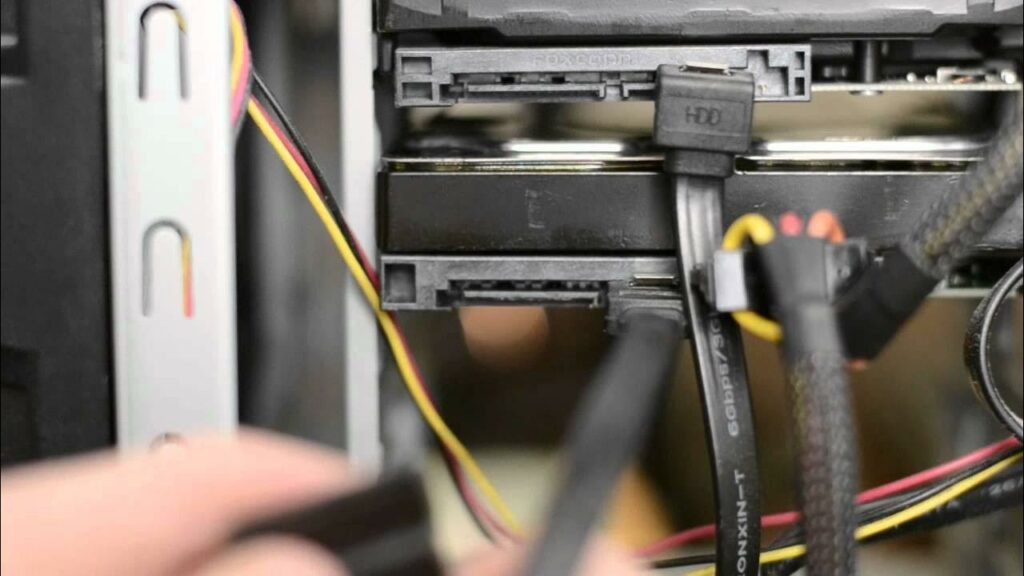
- Connect SATA Data Cable:
- Take a SATA data cable and connect one end to the SATA port on the motherboard. Align the L-shaped notch on the cable connector with the notch on the port, then gently press the connector into place.
- Connect SATA Power Cable:
- Take a SATA power cable from the power supply unit (PSU) and connect it to the corresponding SATA power connector on the storage drive. Align the L-shaped notch on the connector with the notch on the drive’s power input, then gently push the connector until it clicks into place.
Step 4: Secure and Organize Cables
- Secure Cables:
- Route SATA data and power cables neatly along designated cable management channels or tie-down points inside the case. Use cable ties or Velcro straps to secure cables and prevent them from obstructing airflow or tangling with other components.
- Close Your Computer Case:
- Once all storage drives are securely installed and cables are connected, carefully close the computer case and secure it with screws or latches. Ensure all screws are tightened to prevent vibrations.
Step 5: Test and Initialize Storage Drives
- Power On Your Computer:
- Plug your computer back into the power source and power it on.
- Check Drive Recognition:
- Access BIOS/UEFI settings to verify that the storage drives are detected by the motherboard. If detected, you may need to initialize and format new drives using Disk Management (for Windows) or Disk Utility (for macOS).
Step 6: Maintenance and Troubleshooting
- Regular Maintenance:
- Periodically check the health and performance of storage drives using disk diagnostic tools provided by the drive manufacturer or operating system.
- Troubleshooting:
- If a storage drive is not recognized or behaves abnormally, check cable connections, drive power, and motherboard settings. Ensure drivers are up to date and consider testing the drive in another system if issues persist.
Conclusion
Attaching storage drives is a straightforward process that involves securing the drive in the case, connecting SATA data and power cables, and ensuring proper cable management. By following this step-by-step guide and taking necessary precautions, you can successfully install SSDs or HDDs to meet your storage needs in a desktop computer system.
Always refer to specific instructions provided by your computer case, motherboard, and storage drive manufacturers for detailed guidance and compatibility information tailored to your hardware.


