A Comprehensive Guide to Harnessing Spell Check in Microsoft Word
In the realm of word processing, accuracy and professionalism are paramount. Whether you’re drafting an important business proposal, crafting an academic essay, or composing a heartfelt letter, ensuring that your writing is free from spelling errors is essential. Fortunately, Microsoft Word provides a powerful tool known as “Spell Check” to help users detect and correct spelling mistakes with ease. In this extensive guide, we’ll delve into the intricacies of using spell check in Microsoft Word, empowering you to produce polished and error-free documents with confidence and efficiency.
Understanding the Importance of Spell Check:
Before diving into the practical aspects of using spell check, it’s crucial to recognize the significance of this tool. Spelling errors can detract from the clarity, credibility, and professionalism of your writing, potentially undermining the impact of your message. Whether it’s a simple typographical error or a more subtle misspelling, even minor spelling mistakes can diminish the reader’s perception of your competence and attention to detail. Spell check serves as a vigilant guardian, helping you identify and rectify spelling errors before your document reaches its audience.
Basic Spell Check Operations:
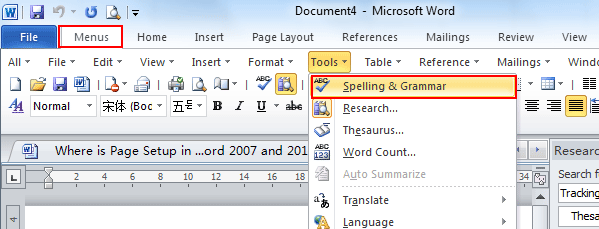
Using spell check in Microsoft Word is a straightforward process that can be accomplished in just a few simple steps. Here’s how to do it:
- Initiate Spell Check:
- Once you’ve finished drafting your document or made significant edits, navigate to the “Review” tab located in the top menu bar of Microsoft Word.
- In the “Proofing” group, you’ll find the “Spelling & Grammar” button. Click on this button to initiate the spell check process.
- Review Spelling Suggestions:
- Word will begin scanning your document for spelling errors, highlighting each error it detects with a squiggly red underline.
- As you review each spelling error, Word will offer suggestions for possible corrections in a context menu. Simply right-click on the underlined word to view and select from the available suggestions.
- Accept or Ignore Suggestions:
- For each spelling error, you have the option to accept one of the suggested corrections, ignore the error if it’s not actually incorrect, or manually correct the error yourself.
- To accept a suggested correction, click on the correct spelling from the context menu. Word will automatically replace the misspelled word with the selected correction.
- To ignore a spelling error, click on “Ignore” in the context menu. This tells Word to skip over the current error without making any changes.
- To manually correct a spelling error, simply edit the word directly in the document by typing the correct spelling.
- Continue Spell Check:
- After reviewing and correcting each spelling error, Word will continue scanning the document until it reaches the end. If no further errors are found, you’ll receive a message indicating that the spell check is complete.
Advanced Spell Check Options:
While the basic spell check process suffices for most scenarios, Microsoft Word offers advanced options and customization features to enhance the spell checking experience. Here are some additional features you may explore:
- Customizing Spell Check Settings:
- Word allows users to customize spell check settings to suit their preferences and specific needs. To access spell check settings, click on the “File” tab, select “Options,” and then navigate to the “Proofing” section.
- In the Proofing options, you can customize settings such as the dictionary language, automatic spelling correction options, and exclusion dictionaries.
- Checking Grammar:
- In addition to spell check, Word also offers grammar checking capabilities to help users identify grammatical errors and improve the clarity and coherence of their writing. To check grammar along with spelling, simply click on the “Spelling & Grammar” button in the Review tab.
- Adding Words to Dictionary:
- If Word flags a word as misspelled that you know is correct or uses specialized terminology, you can add it to the dictionary to prevent future spell check errors. Simply right-click on the word, select “Add to Dictionary,” and Word will recognize it as a valid word in future spell checks.
Best Practices for Spell Check Usage:
While spell check is a valuable tool for detecting and correcting spelling errors, it’s essential to use it judiciously and in conjunction with other proofreading techniques. Here are some best practices to consider:
- Proofread Carefully:Spell check is not foolproof and may not catch every error, especially homophones (words that sound alike but have different meanings and spellings) or contextually incorrect words. Always proofread your document carefully to ensure accuracy and coherence.
- Use Multiple Proofreading Passes:Conduct multiple proofreading passes, focusing on different aspects of your writing with each pass. Start with spelling and grammar, then move on to clarity, coherence, and overall readability.
- Consider Context:Context is key when evaluating spelling suggestions provided by Word. Always consider the context in which a word is used and ensure that the suggested correction makes sense in the context of your document.
Conclusion:
Spell check in Microsoft Word is a valuable ally in the quest for error-free writing, offering users a convenient and efficient way to detect and correct spelling errors. By mastering the basic spell check process, exploring advanced options, and adopting best practices for usage, you can ensure the accuracy, professionalism, and clarity of your documents. Whether you’re writing a report, composing an email, or crafting a creative masterpiece, spell check empowers you to communicate your message with confidence and precision. So, the next time you embark on a writing endeavor in Word, remember to harness the power of spell check to polish your prose and elevate your writing to new heights.


